Tortas de Milanesa

Torta de Milanesa, shown open-faced

Tortas – Mexican sandwiches – are one of my favorite foods by which I commonly measure Mexican restaurants. The humble torta seems spretty simple, consisting of various taco and salad ingredients on a nice roll, but it’s definitely a skill to do it right.

I’m preparing for a “Last Meal“-themed party in a couple weeks, so I thought I’d try making tortas myself as a potential candidate for the party. The one I made here is the common “Torta de Milanesa,” basically a Mexican breaded steak sandwich.

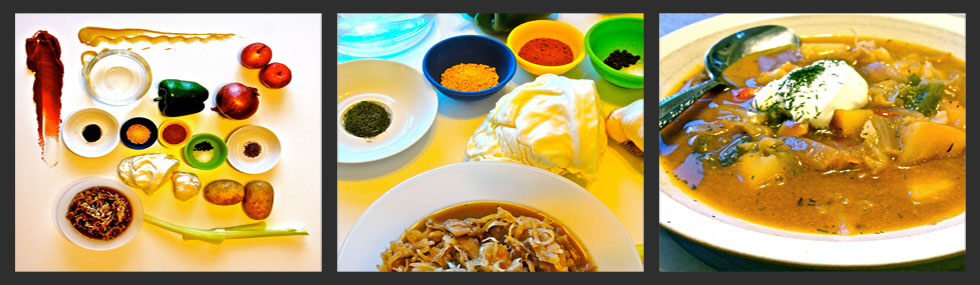
Ingredients for Tortas de Milanesa

Ingredients:

  • thinly cut round or other steak, i.e., 1/4″-1/3″ thick
  • refriend beans (I used some made with chorizo)
  • flour
  • egg (beaten, as a wash to adhere the flour)
  • onion
  • tomato
  • lettuce
  • ripe avocado
  • rolls, e.g., club rolls or baguette
  • oil, e.g., canola
  • hot sauce, e.g., Valentina Salsa Picante

An unusual choice I made was to use masa flour, the sort used to make corn tortillas, rather than all-purpose flour and/or bread crumbs; this was so that the steak cutlets would be acceptable to my gluten-free friends. (Of course, the roll would be eliminated for them too.)

Flattened, tenderized round steak, ready for dipping in egg and dredging in spiced flour

Trim the steak and pound the steak pieces to tenderize and flatten to about 1/4″ thick. Dip them in egg wash, and then in flour that is spiced generously with salt and pepper.

Breaded steak frying in canola oil

Pan fry the breaded cutlets in oil, a couple minutes per side until cooked through.

Pan-fried, masa flour-breaded, round steak

To assemble the sandwich, slice the roll, e.g. a club roll, and consider removing some of the bready inside (to make room for ingredients, while making the sandwich still able to be easily managed in hand). Then smear the roll with refriend beans, add the breaded steak, sliced raw onion, sliced tomato, chopped lettuce, avocado slices, and hot sauce.

Torta de Milanesa

Here are some torta recipes that I consulted:

To be honest, this first attempt of mine was tasty, but no where near the best torta I’ve had. I have some adjustments to make to perfect it. The masa flour worked fine, but I would spice it even more generously. The meat really needs to be tenderized thoroughly, otherwise chopped for the sandwich so that it’s easy to bite through. The roll is a particularly difficult part… while it may be true that a crusty bread or roll is common, it makes it extremely messy to eat because the beans and avocado are squeezed out of the sandwich as you bite. The restaurant I most often visit uses a large, round soft roll, that doesn’t result in this problem.

There are a lot of common torta variations such as vegetarian (avocado), pulled chicken, and chopped steak.

Enjoy this favorite of mine sometime at a restaurant or at home!

Cashew Shrimp

Spicy Cashew Shrimp

I just returned from traveling today and decided to make a dinner from the few ingredients I had left in the house.

Ingredients:

  • raw shrimp, thawed from frozen
  • cashews, raw and pan roasted
  • carrot, sliced
  • red jalapeno, seeded and finely-sliced
  • canola oil

Sauce ingredients:

  • oyster sauce
  • water
  • honey
  • rice vinegar
  • chili garlic sauce
  • minced garlic
  • corn starch slurry

Preparation:

In a large pan with canola oil, sauté sliced carrot and jalapeno until carrot is mostly the desired tenderness. Add shrimp and cook just a couple minutes until almost finished. Add cashews, turn off heat and pour on sauce, mixing promptly and thouroughly as it thickens. (Add water as necessary to get desired sauce consistency.)

Spicy Cashew Shrimp with carrot and ripe jalapeno

This is a simple dinner that I was quite happy to enjoy back at home after a week away – and there was no skimping on the shrimp and cashews in my “restaurant.” :)

This combination of ingredients was really good… I bet it would be nice with celery or onion too.

Spicy Squash and Carrot Soup

Spicy Squash and Carrot Soup

Here’s a zippy soup for a rainy autumn day, which is what we have here today.
It’s sweet, from butternut squash, and definitely spicy, from poblano pepper.

Ingredients (to make about 2 quarts of soup):

  • 1/2 large butternut squash, seeds removed, peeled, and cubed
  • 4 medium carrots, cut into large pieces
  • 2 medium red bell peppers (I used one large bell pepper and one smaller ripe pepper of unknown variety)
  • 2 green poblano peppers
  • 4 medium to large scallions
  • 2 cloves garlic
  • olive oil, ~1/3 cup
  • salt and pepper to taste
  • water, ~2 cups (saved from boiled squash and carrots)

Preparation:

First, boil the cubed squash and carrot until quite tender.

Boiled butternut squash and carrot

While the squash is boiling, roast peppers and onions under the broiler. Turn and move while roasting to blister pepper skin evenly and to avoid burning scallions.
Peel, core, and remove seeds from the peppers, and roughly chop the scallions.

Roasted red bell peppers, poblano peppers, and scallions

Dry-roast two cloves of garlic until tender, then peel and roughly chop.

Dry roasting garlic cloves

Lastly, using a food processor and/or blender, purée all the ingredients while adjusting the thickness with the water; add olive oil, salt, and pepper to your taste.

I used both a food processor and traditional blender, in two rounds each with about half the ingredients because the quantity of soup exceeded the capacity of my blender.

Spicy Squash and Carrot Soup, topped with thyme and toasted squash seeds

Serve the soup topped with dried or fresh thyme leaves and toasted squash seeds, perhaps accompanied by a piece of sourdough toast.

(I toasted the lightly oiled seeds with salt, pepper, and paprika on a baking sheet in a 250° F oven.)

I hope you enjoy this blended vegan soup – it’s perfect for cool fall days!

It was inspired by this recipe:

Butternut Squash Curry

Butternut Squash Curry

It’s hard to pass up the beautiful squash at the farmers’ market this time of year.  I’ve been anxious to use the ones I bought recently, so this is my first squash recipe of the season.

Butternut squash, onion, red pepper.

For four servings, here are the ingredients:

  • 1/2 large butternut squash, cleaned of seeds, peeled, and cubed
  • 1 medium yellow onion, medium chop
  • 1 large red pepper, medium chop
  • ghee (or substitute canola or sunflower oil)
  • cumin seed
  • 1 habanero pepper, finely minced
  • 4 garlic cloves, finely minced
  • powdered ginger
  • turmeric powder
  • garam masala
  • salt

Tip: ave, rinse, and toast the butternut squash seeds just like pumpkin seeds!

Squash, onion, and red pepper, prepared for roasting.

To prepare, toss the squash,onion, and red pepper lightly in canola oil, lay out on a baking sheet, and bake at 375-400° F for 30-45 minutes, until squash is tender, but not completely mushy.  Stir these ingredients on the sheet occasionally, to cook evenly.

When the vegetables are nearly done roasting, prepare curry spices in a large pan over moderate heat.  Toast cumin seeds in ghee, add turmeric, garam masala, then stir in a paste made of the garlic, ginger, and habanero.  Once the turmeric is cooked satisfactorily, stir in the roasted vegetables to coat evenly with these curry seasonings and salt to taste.

Combining the roasted vegetables with curry seasonings.

This dish was served accopanied by raita and rice.
The raita consisted of the following:

  • homemade yogurt
  • carrot, finely chopped
  • red pepper, finely chopped
  • scallion, finely chopped
  • salt

The basmati rice was prepared in a rice cooker with cumin seed and saffron threads.

My housemate had earlier prepared a nice dal that we served with the meal along with a store-bought naan.

Butternut Squash Curry served with basmati rice, raita, naan, and dal.

All in all, this was a pretty complete meal for a couple of computer science students… and a welcome return of fall/winter vegetables to the table.

Autumn’s early sunsets have been causing me much trouble with photographing dinners. Lots of adjusting color in photos, due to the exclusively artifical light in the house, and I’m still not very happy with it.

Here are some related recipes that I consulted when concocting this meal:

Shrimp Calzone with Hoisin Sauce

Shrimp Calzone with Hoisin Sauce

Having bought pizza dough for two pizzas, my housemate and I decided to make one pizza and two calzones.

We divided one Trader Joe’s pizza dough into two equally-sized balls and stretched them out into somewhat round pieces on a lightly floured surface.

For this asian-fusion calzone, I used the following ingredients:

  • onion, small strips, lightly sautéed in olive oil
  • carrot, julienne or matchstick, lightly sautéed
  • Monterey Jack cheese, shredded
  • cooked shrimp, e.g., lightly sautéed, from raw, frozen
  • edamame beans, cooked, shelled (e.g., ready-to-eat from TJ’s)
  • garlic, finely sliced
  • hoisin sauce (optional inside)
  • Pecorino Romano cheese, finely shredded
  • olive oil

Place the filling ingredients atop the flattened dough, e.g., in the order above, then fold the crust over and pinch the edges to close.  (Use the hoisin sauce sparingly inside; it’s quite strongly flavored and typically you do not put sauce inside a calzone anyway.)

Brush the top lightly with olive oil, and top with grated Pecorino Romano cheese.

For an accompanying dipping sauce, simply mix the following to desired consistency and taste:

Bake calzones on parchment paper on a baking sheet, ~25 minutes at 425° F, until crust is golden brown, like the edges of a nice pizza crust.

Calzones made with Trader Joe’s pizza dough.

Making calzones was a nice alternative to pizza, and pretty convenient for lunch the next day.

Enjoy!

My Favorite Salsa Recipe: Salsa Romesco

Four canned salsas based on Salsa Romesco with (left to right) pasilla, chipotle, habanero, and cayenne

Here’s a spectacular salsa that I’ve been making for 15 years – Salsa Romesco, with a surprising ingredient: almonds!

If you’re a friend to whom I’ve given salsa, it almost certainly was this one.
It’s a spanish recipe from chef Mark Miller’s excellent guide, “The Great Salsa Book.”

The particularly nice qualities of this salsa are its sweetness from red pepper, its relatively smooth, thick consistency (e.g., for dipping chips or as an enchilada sauce), and its easily adjustable heat simply based on the amount of powdered cayenne pepper. I’ve included the original recipe below.

In a moment of farmers’ market enthusiasm, I bought a 25 pound box of tomatoes for $10. It turns out that’s a lot of tomatoes! I oven-roasted about half of these large, wonderfully red tomatoes to make 4 slightly different salsas.

To oven-roast tomatoes, simply cut them and lay them out on a sheet in a 250° F oven for 2-3 hours.  I put a bit of salt on on them beforehand. Large tomatoes can be quartered and roma tomatoes, as the original recipe called for, halved.

Quartered, and salted, tomatoes ready for oven-roasting.

The roasting removes some of the moisture, setting up for a nice blended salsa of a thick consistency and water doesn’t separate so much as with raw tomato-based salsas. (Of course, those salsas have their place; who could live without pico de gallo?)

I’ve made this Salsa Romesco many, many times (recipe below), spiced just with cayenne. This time I also rehydrated some pasilla and chipotle (meco type) peppers while the tomatoes were roasting, and finely minced one seeded, deveined fresh habanero. This was to make salsa variations with differing hotness and flavors. My pasilla peppers happened to be considerably hotter than the chipotle… many pepper varieties’ hotness is somewhat unpredictable.

Soaking dried pasilla and chipotle peppers

Once the tomoatoes are roasted, you can simply blend them in a food processor or blender for sauces and salsas.

Oven-roasted tomatoes, after about 3 hours at 250° F

After the passive hours of roasting tomatoes and rehydrating peppers, you’re ready to make this salsa; everything is blended, so there’s not much chopping.

Ingredients, in addition to tomatoes, needed for Salsa Romesco.

There is a bit of work; you will need to remove the skins from red peppers. I suppose removing the skin is optional, but it does two things: (a) it makes the salsa sweeter since the skin imparts a little bitterness, and (b) it keeps the skins (mostly) out of the resulting salsa, so it doesn’t get stuck between your teeth.

Red bell peppers, roasted for peeling

For me, the easiest way to roast and peel bell peppers has been to place them on a foil-lined sheet very near the heat in the broiler, watching them carefully and rotating them until all sides are blackened as shown.  Place the roasted peppers in a plastic bag or covered bowl for a while to steam them (helping the skin to separate), and then peel them (as best you can), remove core and seeds, and rinse the pepper.

Here’s Mark Miller’s recipe (my comments in parentheses… I approximately tripled this in quantity):

  • 10 Roma tomatoes, oven-roasted
  • 2 red bell peppers, roasted, peeled, seeded, and roughly chopped
  • 3 cloves garlic
  • 1/2 cup toasted sliced almonds
  • 2 teaspoons cayenne powder (careful! … to taste, make separate salsas for different palates)
  • 1 teaspoon salt
  • 2 tablespoons sherry vinegar (or apple cider vinegar)
  • 1 tablespoon fresh lemon juice
  • 1 tablespoon virgin olive oil

Place all ingredients in a food processor or blender and purée.
Variation: Add 1 anchovy filet to the food processor.
Note: This is a classic Spanish salsa.
Serving suggestions: A versatile salsa, good with tortilla chips or as a dip for vegetables; with grilled meats fish or eggs; or as a soup garnish.
Yield: About 1 3/4 cups
Heat: 5-6 (of 10, it solely depends on how much cayenne powder you add, it’s even nice and sweet with almost no cayenne… but I usually make it spicy.)

I made 4 variations, canning some of each for wintertime and keeping some fresh in the refrigerator (for days, at least), shown left to right in the top photo:

  • Hot pasilla and red pepper
  • Medium chipotle and red pepper
  • Hot habanero-garlic and red pepper
  • Mild sweet red pepper

I shared them with friends and all were popular but my favorites were the hot pasilla and the hot (fresh) habanero and garlic.

Fresh prepared salsas based on Salsa Romesco recipe

As I said, this salsa is my favorite to make myself and is a great foundation for creativity.
It takes a few hours, but most of that is not active time; it’s just waiting.  Maybe make a nice meal in the mean time, while the kitchen has the pleasant smell of roasted tomato. :)

Swiss Chard Gołąbki with Apple-Tomato Sauce

Swiss chard gołąbki with apple-tomato sauce and sour cream

Those of you of Polish heritage, like me, will likely be familiar with gołąbki; they’re delicious stuffed cabbage rolls, often with meat and rice inside and covered in a tomato sauce.

This is a similar dish but vegetarian and made with swiss chard rather than cabbage leaves, and a sauce with an extra touch of sweetness from apple.  It’s based on a recipe for “Baked Swiss Chard Rolls” given to me by a friend who often shares her home-grown chard.

Filling rainbow chard leaves with a mixture of spiced mashed potato and slivered almonds.

I made more potatoes and a more rolls in total than the recipe called for.

Chard leaves with stuffing, ready to roll-up.

The chard leaves are pretty substantial, so it wasn’t difficult to roll them.

Swiss chard rolls in a lightly oiled baking pan, ready to be topped with sauce.

As I had just oven-roasted tomatoes for salsa, I made fresh tomato purée in a blender.

Tomato and apple purée to top the rolls before baking

Here’s the recipe as it was given to me:

  • swiss chard, 1 bunch
  • potatoes, 2 medium, boiled, peeled, and mashed
  • onion, 1/2 cup, chopped
  • cumin seeds, 1/4 t., toasted
  • cayenne powder, 1/8 t.
  • peanuts, 1 T., crushed, toasted
  • basil, 1/4 t. dried
  • salt, 1 t.
  • tomato purée, 1 cup
  • walnuts, 1/4 cup, coarsely chopped
  • dates, 2 T., chopped
  • apple, 1 small cooking, cored, grated, dressed with lemon
  • sour cream, for garnish
  • tomato wedges (optional)
  1. Select 6 large, perfect chard leaves. Trim off all but 1/2 inch of the stem. Wash the leaves well.
  2. In a large saucepan, bring 6-8 cups of lightly salted water to a boil over high heat. Push the leaves gently down into the boiling water and cook uncovered until limp, 1-2 minutes.
  3. Position rack in center of oven and preheat oven to 375° F.
  4. In a small mixing bowl, combine the mashed potato, onion, cumin, cayenne, peanuts, dried herbs and 1/2 t. salt. Mix well.
  5. Divide the mixture among the chard leaves, roll up the leaves, tuck in the ends to enclose stuffing. Place seam-side down in a 3-quart (13 x 9″) baking dish.
  6. Combine the tomato purée, walnuts, dates, apple, and remaining 1/2 t. salt. Stir well and pour over the chard rolls to moisten the entire surface. Cover the pan and bake until the filling is hot – about 15 minutes. Transfer to a warmed serving dish. Top with sour cream and garnish with tomato wedges (if desired.)

I liked this vegetarian recipe that was amenable to modifications (e.g., I used slivered almond and pine nuts, and puréed the apple into the sauce rather than grating it). Compared to typical gołąbki, the swiss chard (instead of cabbage) leaves are somewhat tough to eat with just a fork. Be sure to cook the chard leaves until tender. I also baked these for more than double the time suggested, just be careful not to allow the sauce to burn.

Kohlrabi Curry and Paprika Fish

Kohlrabi Curry and Paprika Fish

A friend with a garden plot gave me a nice selection of vegetables that I used for this curry:

  • kohlrabi
  • eggplant
  • onion
  • jalapeno peppers (seeded)
  • zucchini

Additionally, I used these ingredients:

  • apple (e.g., Braeburn)
  • oil
  • garlic
  • cumin seed
  • turmeric
  • garam masala
  • salt
  • water
  • homemade yogurt
  • cooked rice

I usually wouldn’t add rice into a curry (but rather serve it on the side, as is traditional), but I had added too much water (to boil off without overcooking the vegetables), so I added some cooked rice at the end to soak up some of the water and thicken the curry.

Fresh Curry Ingredients

I’ve not cooked with kohlrabi before, but upon dicing it, I realized it’s going to take a lot longer to cook (until tender) than the other ingredients.  Cut the apple and vegetables to their desired size for the curry; for instance, I like onion in strips (top to bottom of onion), zucchini in slices.

Curry Ingredients

To further spice the curry, I added bay leaves, cardamom pods, star anise, and to the oil with the cumin seed, turmeric, and garam masala, then cooked the kohlrabi in that mixture for 15-20 minutes (until somewhat tender) before adding any more vegetables.  (I removed the cardamom, star anise, and bay leaves at that point.)

Oil and spices

While cooking the vegetables, I periodically added water and covered the dish to steam the vegetables.  Once they were the desired tenderness, I stirred in yogurt and some cooked rice.

The curry: almost finished

For the fish, I prepared a mixture of mild spanish paprika, fennel seeds, salt, and pepper, and coated swai fillets (thawed from frozen) and pan-fried them in hot oil.

Pan-frying the fish

Before turning the fillets over, I applied minced garlic liberally to the top side, then flipped them (once) to cook through until flaky.

I really enjoy anise and fennel, and quite liked how this flavorful preparation of fish went with this somewhat mild curry.

Kohlrabi Curry and Paprika Fish

Sailcooking: Wood-Fired Steak and Spicy Green Beans

Our chartered sailboat docked at an island, as seen from the firepit near the beach.

Some of my friends are experienced sailors, and I recently had the awesome opportunity to sail Lake Superior with them; specifically, we explored the Apostle Islands.  There were a total of four of us guys on our chartered sailboat for four days in early September.

I don’t know much about sailing, so I made my primary contribution be our food; I did the food shopping and the cooking of our evening meals including chicken fajitas, birch-grilled steak, and grilled pork chops marinated in salsa verde.

We stayed on the boat every day of the trip; it was conveniently equiped with quite a complete kitchen, and even a propane-fueled grill over the stern.

The sailboat galley with gimbaled stove.

On one day we sailed to an island that had a dock in water deep enough for our keelboat, so that day we grilled ribeye steaks ashore over local birchwood from the boreal forest.

While we are all meat-eating men, we’re not savages.  We accompanied the dinner with a salad with freshly-made croutons of diced sourdough bread browned in olive oil, minced garlic, and salt.

Garlic sourdough croutons.

Mixed greens salad.

Our side dish was spicy green beans, similar to szechuan-style green beans.  Red pepper flakes and garlic were soaked in olive oil for a while, then we sautéed whole, trimmed green beans in that spiced oil.

Spicy green beans.

While I was aboard preparing the sides, one of my fellow sailors expertly grilled our thick ribeye steaks (rubbed with garlic olive oil, and minced garlic, salt and pepper) at the beach over a birchwood fire.  They were excellent, as evidence by my eating before taking a photograph; grilling over wood makes a huge difference in flavor as compared to gas or charcoal.

Ribeye steak grilled over birchwood, spicy green beans, and salad.

It was a spectacular trip, and the four of us guys managed to eat better than we ought to have. Ah, roughing it. :)

Stuffed Tomatoes and Peppers for 18 people!

Stuffed Tomatoes and Peppers to serve 18

So after a bit of a posting hiatus, I’m back… life got busy, mostly with fun stuff, so I haven’t been cooking a lot of new things, but I did find some interesting cooking situations, so here goes.

My girlfriend recently moved into a co-op house with 14 residents in total.  While the house doesn’t share all their food, as some co-ops do, huge dinners are prepared to eat communally; every resident signs-up for nights to make dinner for everyone, and this happens nearly every single day!

Whomever is making a dinner also typically invites other guests of their own. So, for this first dinner, we were preparing for 18 people!  That’s definitely the biggest sit-down home meal I’ve ever participated in preparing.

At the co-op house, appropriately, a lot of the cooking vessels are king-sized.

A giant colander.

And, an advantage is one gets to cook on this huge Viking gas range!

The co-op’s huge Viking gas range.

For the stuffed peppers and tomatoes, we prepared a stuffing of the following:

  • brown rice (cooked)
  • fresh tomato (cores, chopped)
  • fresh mushroom (finely chopped)
  • fresh garlic (minced)
  • fresh italian sausages (removed from casing and browned)
  • both fresh and dried oregano
  • fennel seed
  • cayenne pepper (powder)
  • fresh parsley (finely chopped)
  • salt and pepper
  • parmesan cheese (grated)

This was the first meal we prepared for the co-op; having no idea how long it would take to prepare, we started at about 2pm for a 7pm dinnertime.  (As it turns out, that was none too soon for this first effort.)

Hours of prep, prep, and more prep!

The peppers (selected for large size, and so they could stand upright) and tomatoes were cored and packed in baking pans (lightly greased with olive oil).

Hollowed-out peppers and tomoatoes; italian sausage for stuffing.

The stuffing ingredients were mixed and lightly cooked with the sausage after browning.

Chopped mushroom for the filling; also, tomatoes and minced garlic.

A relatively small amount of sausage was used (5 sausages for 18 total servings), and browned in a large pan.

Browning italian sausage.

Once the filling was mixed together with the cooked brown rice and seasoned to taste, the peppers and tomatoes were filled.  We also made some vegetarian only filling, substituting some more cheese instead of the sausage, and we were careful to keep track of which were the vegetarian ones.

Stuffed and ready for the oven.

For a side, we washed and trimmed 3-4 pounds of fresh green beans.

Prepped green beans.

The green beans were steamed while sliced almonds and garlic were sauteed in oil.

Toasting/browning sliced almonds in olive oil with garlic.

Humongous steamers are great for preparing the vegetables, and the range top with so many gas burners allows many things to be going at once.

To finish the beans, they were tossed with the almonds and some tamari (a gluten-free alternative to soy sauce.)

Green beans with garlic, almond, and soy sauce.

The co-op has a large dining room with a great table, here set for 17 residents and guests!  Two kinds of sliced melon were also served with the dinner.

The co-op’s dining room table, awaiting the dinner bell.

For those residents don’t make it for dinner, the leftovers are packed individually for each of them and left in their respective refrigerators.

So, from this monumental task, here’s what I learned:

  • Food prep takes a long time; in total we took over 4 hours to prepare this meal.  We’ll get better at using the food processor for chopping.
  • Adding spices for very large dishes takes practice… I kept having to add, taste, add, taste, add, add, add!
  • Easy summer foods like sweet corn on the cob and watermelons are great side dishes.
  • The hollowed-out bell peppers can be blanched and partially cooked in boiling water before stuffing them, so that they cook in much less time, similarly to the time for the tomatoes.
  • Some wine before dinner, near the end of the cooking, definitely helps relieve stress. :)
  • A large group makes for quite the convivial kitchen and dinnertime.

Alas, this post isn’t a recipe, per se… I’ve lost track of many quantities and there were a lot of adjustments to taste.  I trust most of you don’t need measurements to prepare such a meal for 18 people, though. :)

If you’d like a stuffed pepper recipe, here are some places to start: