Smoked Chicken Chili

For years I’ve enjoyed sometimes making a white chicken chili, just on the stovetop, with boneless, skinless chicken breast, onion, canned green chilis, and cannellini beans. Since I’ve been smoking meats in my old gas grill for the past year or so, I decided to switch that recipe up; here’s a smoked chicken chili made with those same canned white beans and accompanied by other fresh ingredients.

This sacrifices the unusual, uniform white color of a white chicken chili, for the darker tones one would expect to accompany chicken, onion, and peppers all wood-smoked for hours.

20181222_140550~2

Smoked Chicken Chili with Cornbread Croutons

Here’s what you’ll need, first, for the smoker:

  • 3 boneless, skinless chicken breasts
  • 1 large, sweet onion, halved
  • 3 poblano chili peppers, fresh, core, seeds removed
  • 2-3 cloves fresh garlic
20181221_152548

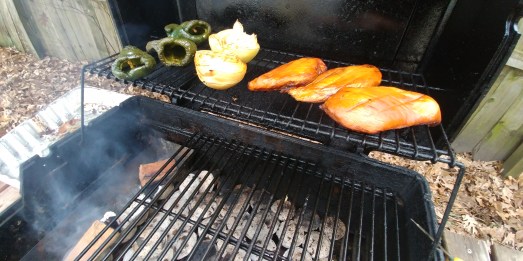
Boneless, skinless chicken breasts, poblano chilis, and sweet onion smoking on Hickory

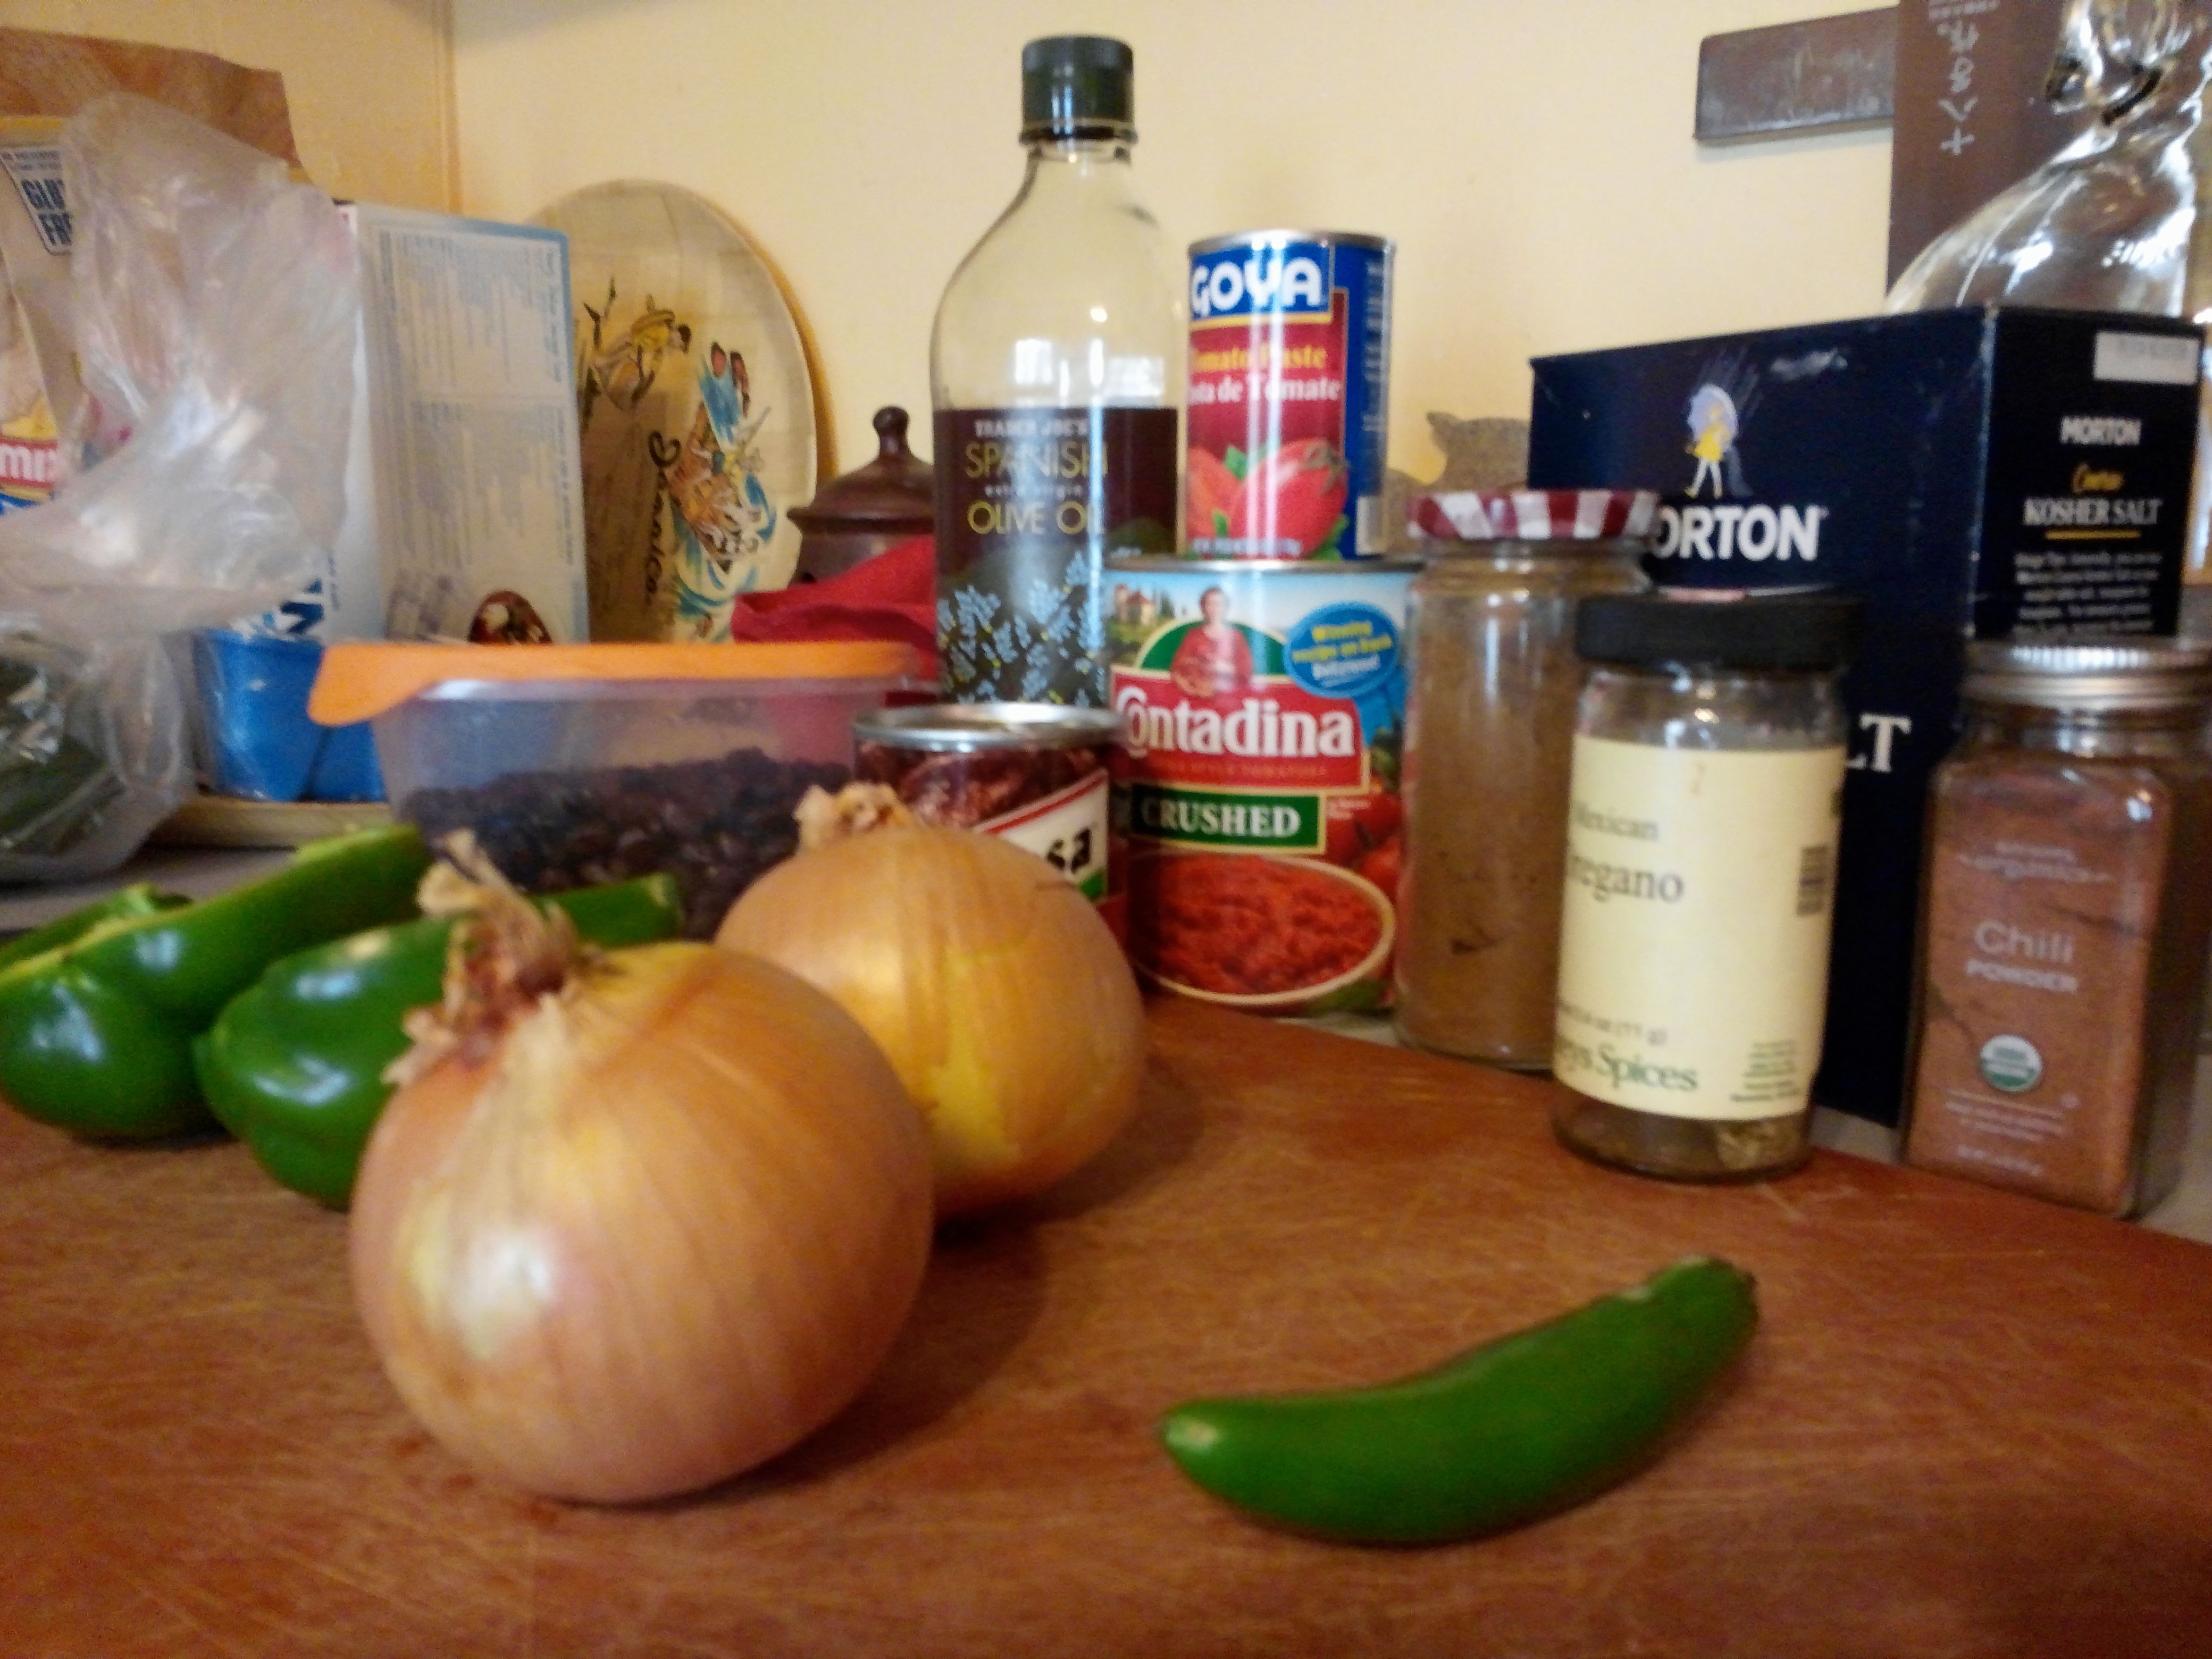
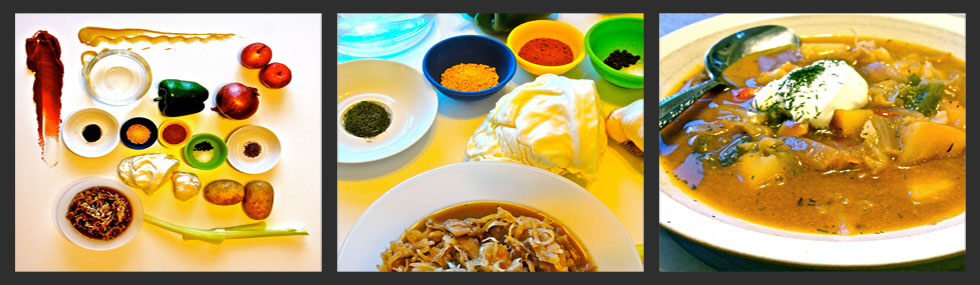
Here are the remaining ingredients to prepare the chili:

  • ~5 cups low-sodium soup stock (I used homemade turkey stock from Thanksgiving’s turkey carcass)
  • 2-3 tablespoons vegetable oil
  • 3 15-ounce cans of cannellini beans, drained

And flavor the chili with the following, to taste:

  • salt
  • ground black pepper
  • Mexican oregano
  • ground cumin
  • ground cayenne pepper (optional)
  • ground Ancho chili pepper (optional)
  • garlic powder
20181222_141041~3

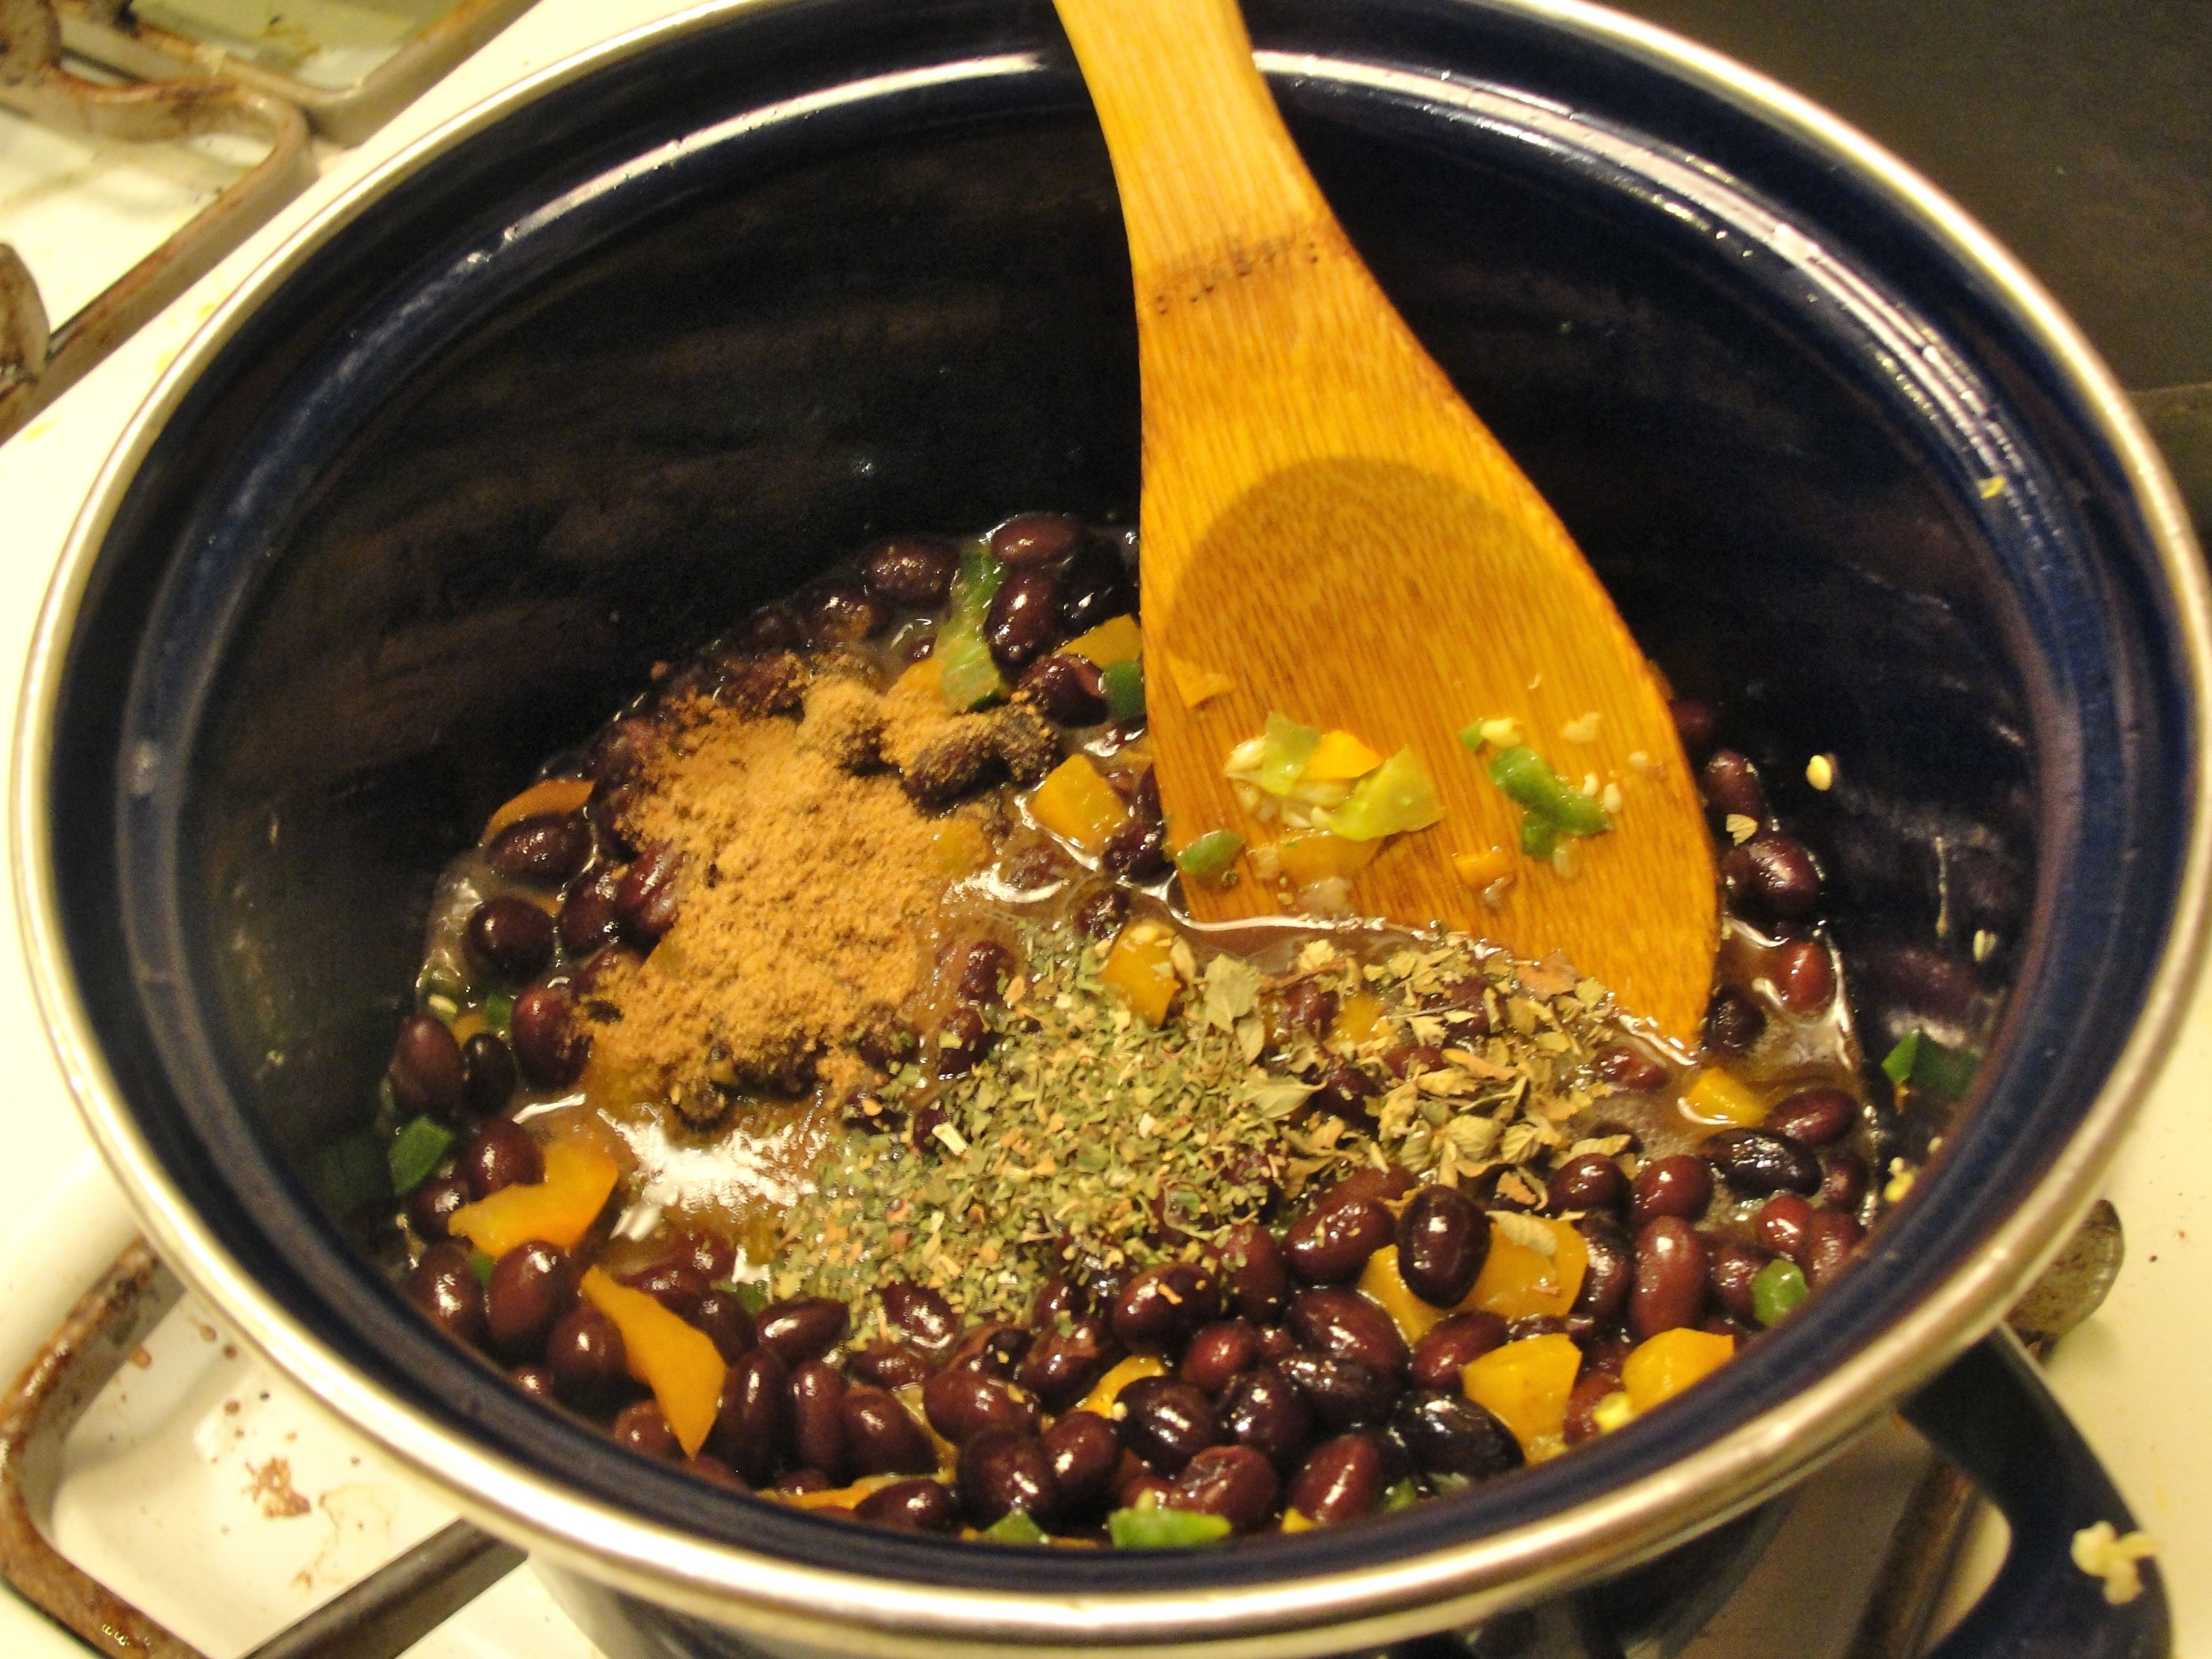
Ingredients to flavor the chili

20181221_182102~4

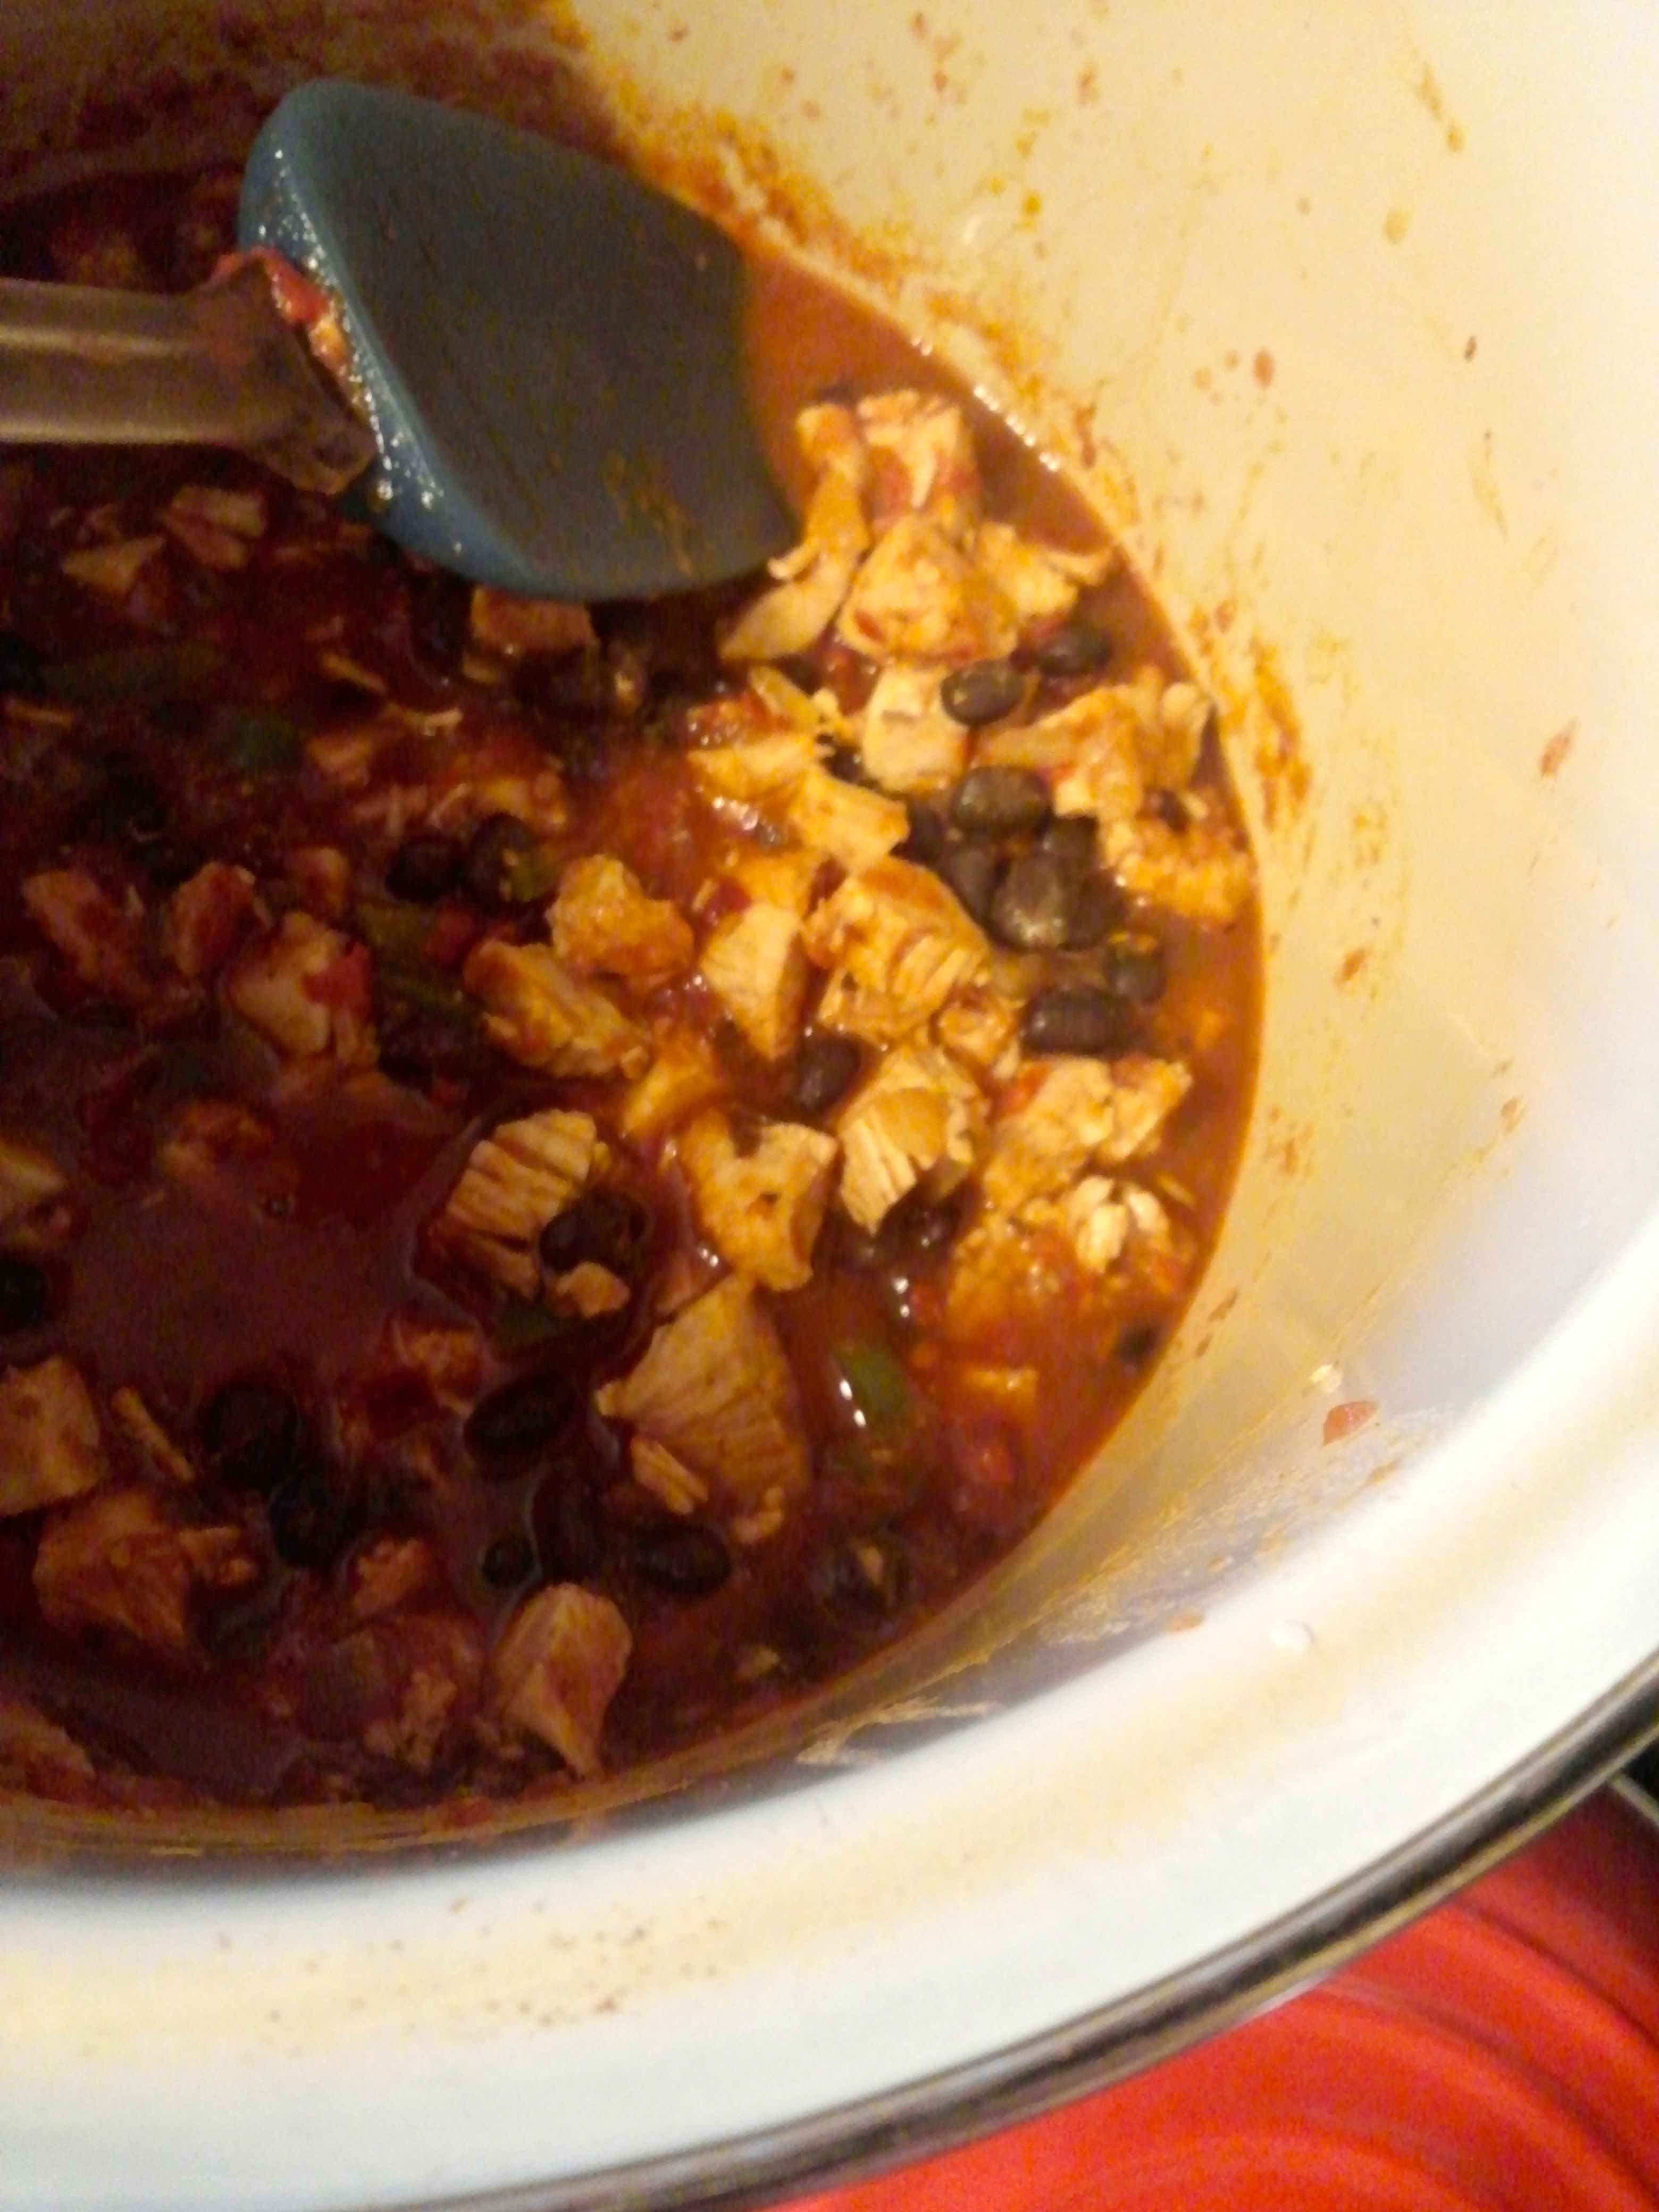
Chicken Chili prior to adding the Cannellini Beans

To prepare:

  • First, I smoked the chicken breasts (lightly salt-brined overnight), halved onion, and cored poblanos for about 3 hours, total, 160-200°F.  Note, the smoking phase should not bring the chicken breasts, inside, to safe temperature to consume. That’s intentional, because it will finish, simmering at a low boil in the chili.
  • Next, prepare like a typical chili in a stockpot: sauté the onions and peppers, chopped to a fairly fine size, in vegetable oil, add minced garlic cloves and spices.
  • Dice the smoked chicken breast, add to pot, stir, add the soup stock; bring to a boil, stirring occasionally, then reduce to a simmer.
  • Add the cannellini beans for about the last half hour. You’ll be less likely to crush them while stirring if you delay adding them.

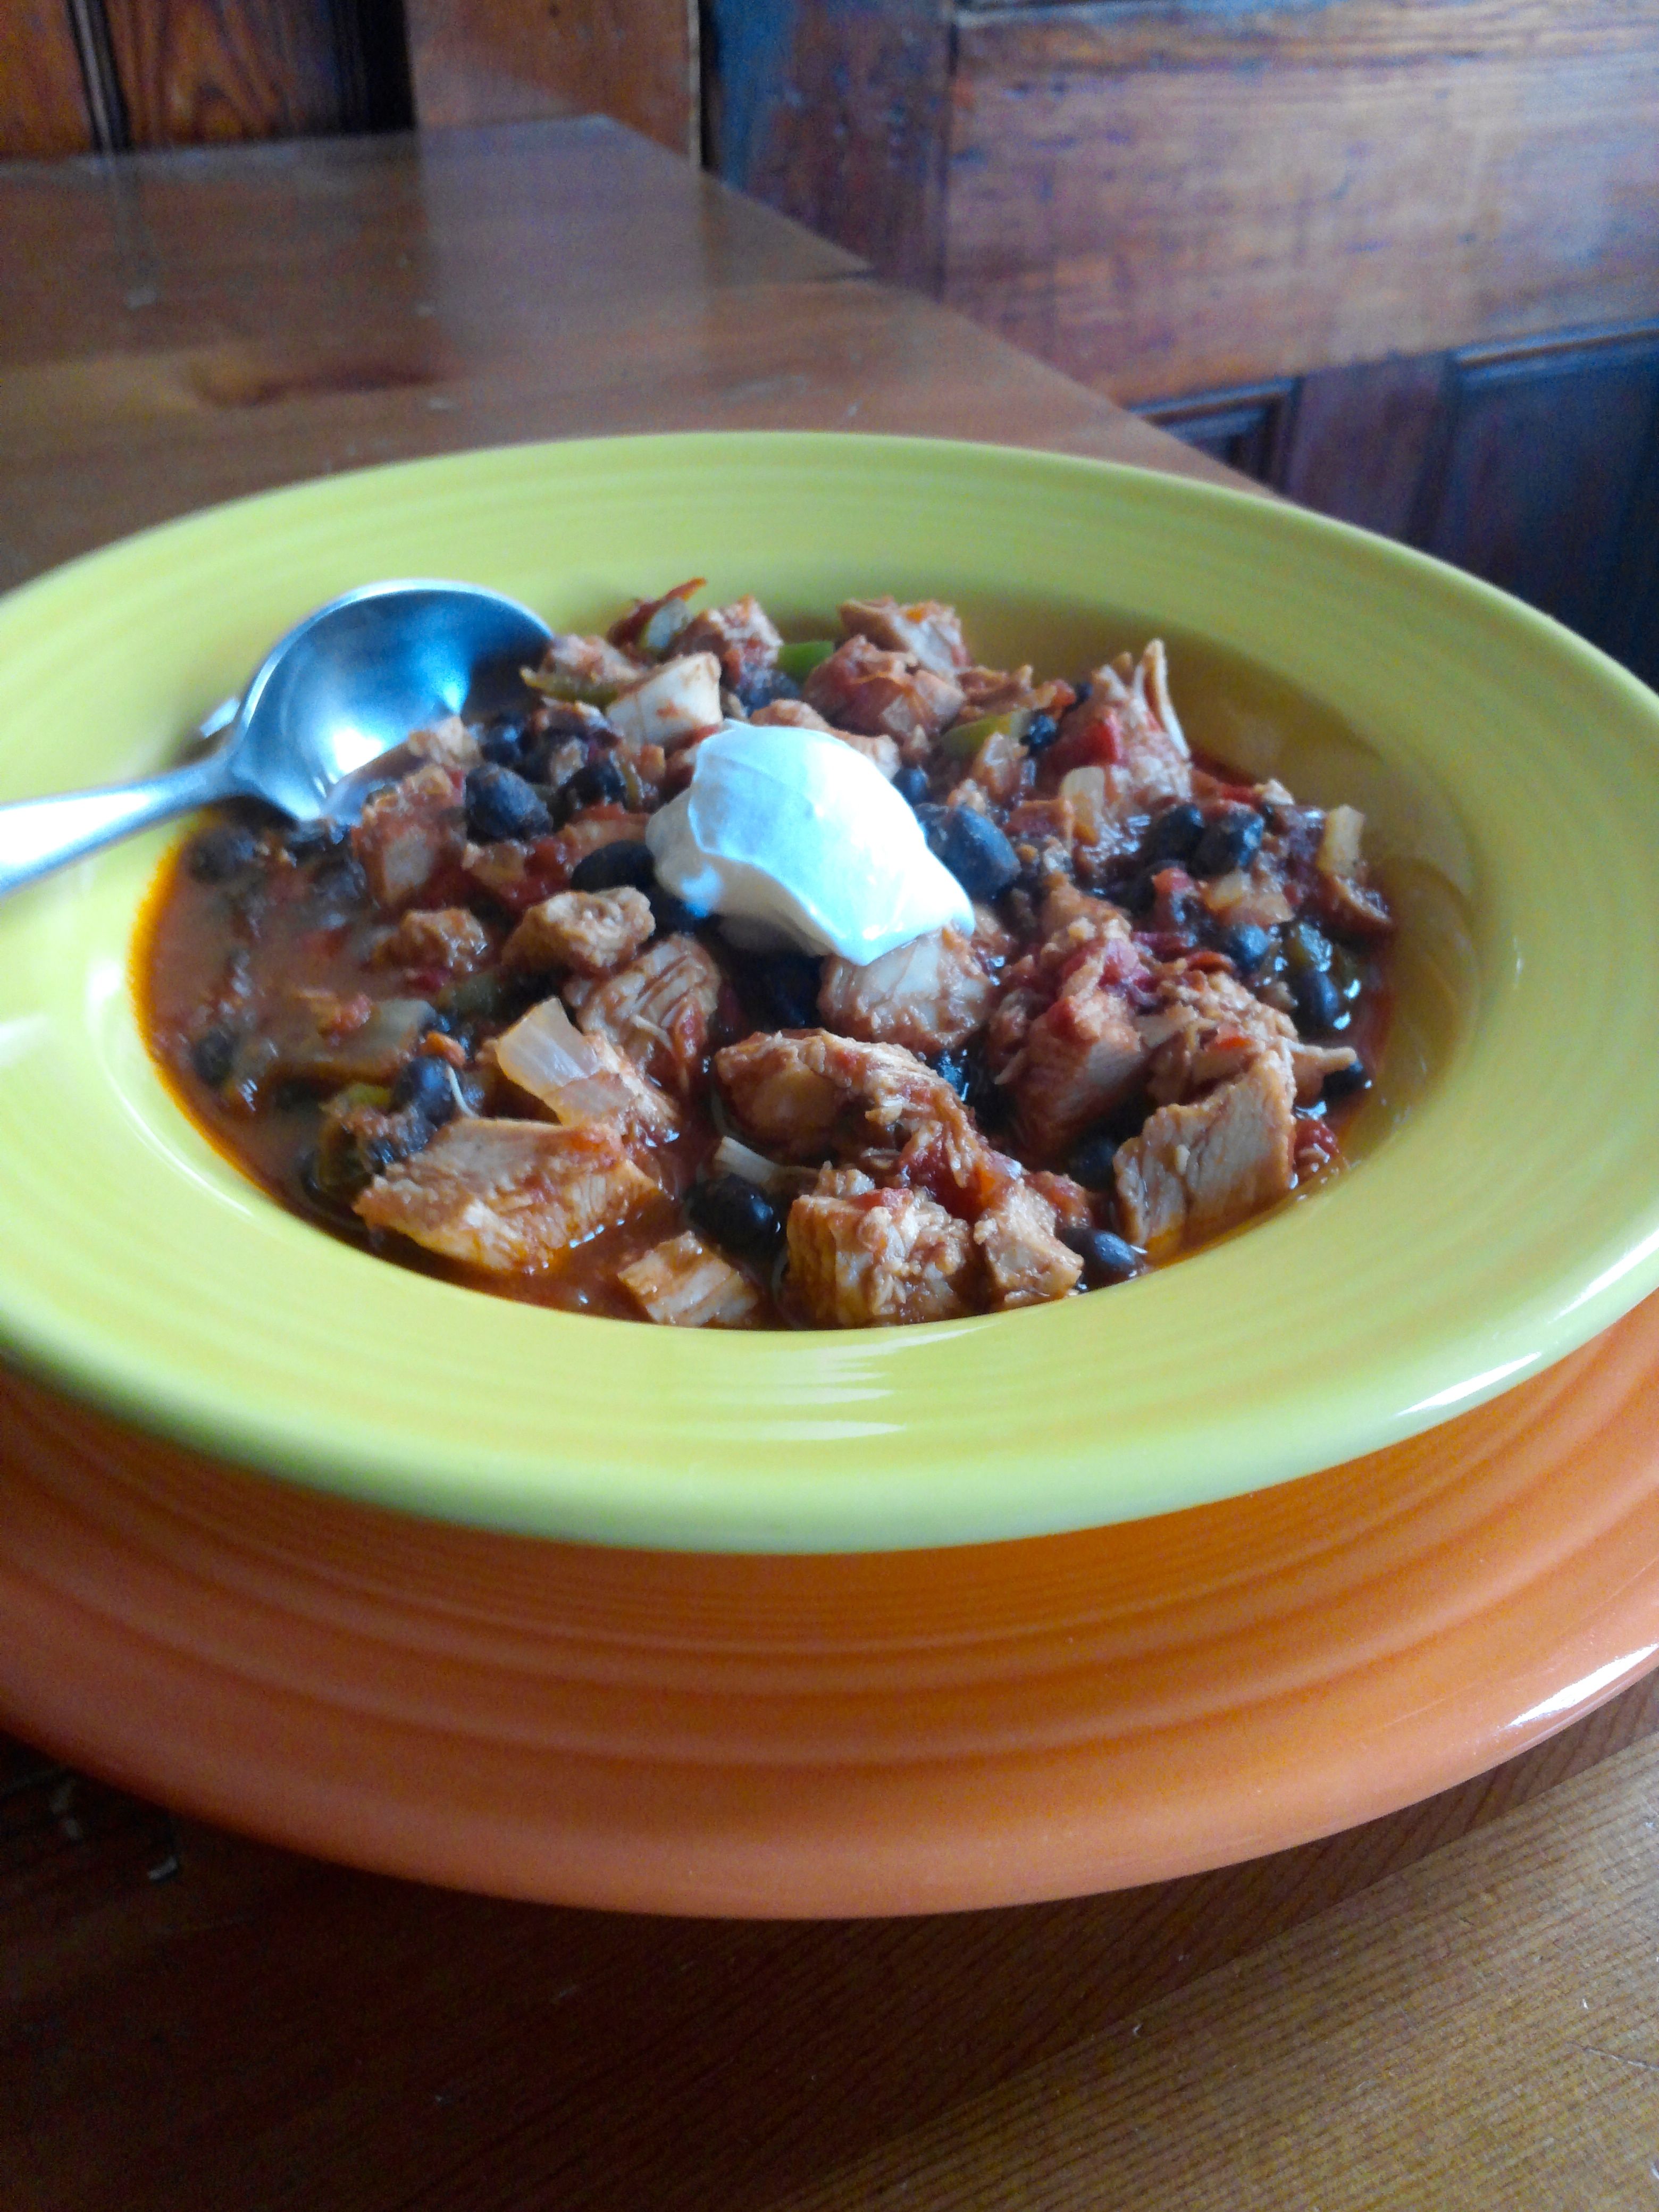
I simmered the chili for about 1.5 hours, total, stirring occasionally, and adjusted the salt and spices to taste, while some water boiled away, concentrating the flavor.

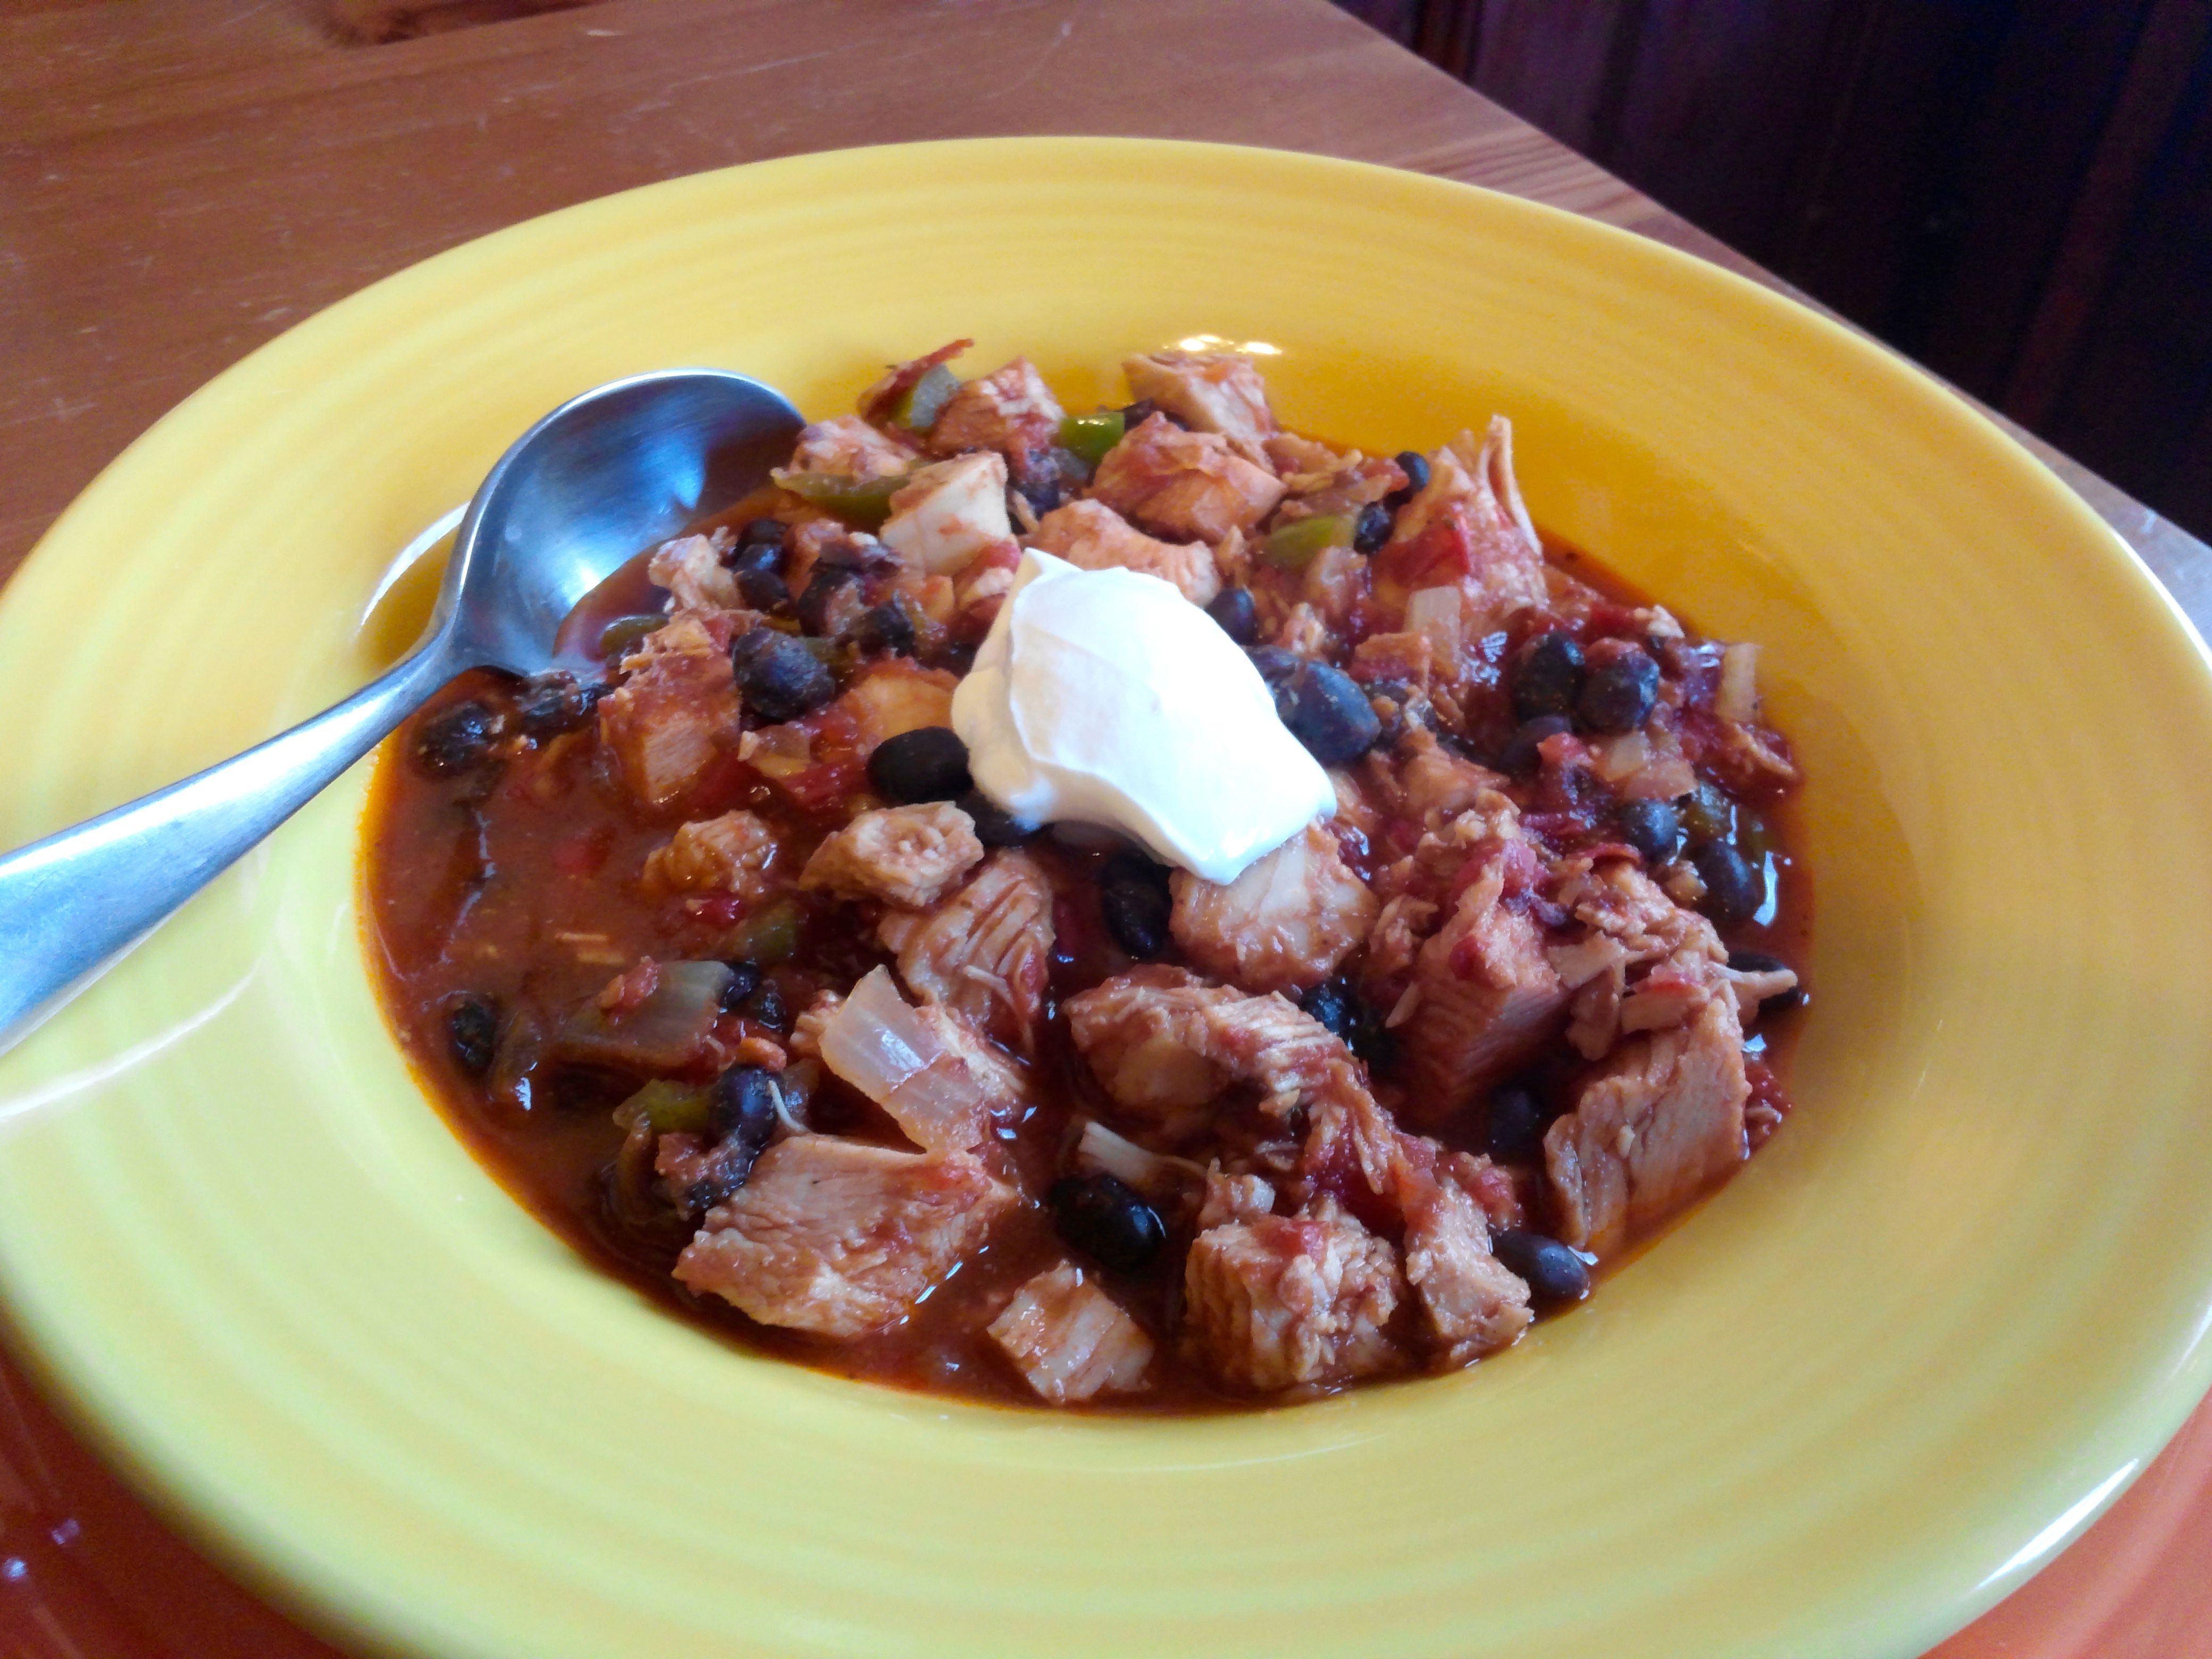
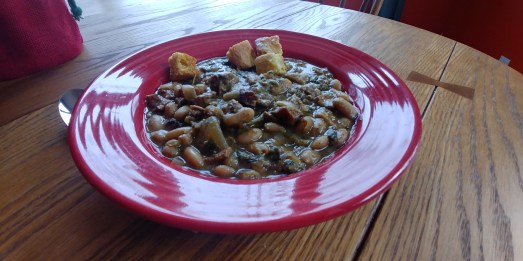
We served this Smoked Chicken Chili as one of three chilis to a gang of guest friends, at home, with choice of many toppings and hot sauces, including homemade cornbread croutons. These substantial croutons work nice in that they soak up a bit of the liquid, but still stay crunchy.

The two other chilis were a Chili Verde, made with pork loin roast and canned tomatillos, and a veggie chili, with corn, a variety of canned beans with the can liquid, and Adobo seasoning.

One guest shared they especially liked the Smoked Chicken Chili for its unique flavor. Having the three chilis allowed each dinner guest to mix them according to their vegetable, poultry, or meat desires. :)

20181222_140616_HDR

So, if you enjoy smoking meats on the grill and have some time to put your talents toward a great chili, give this one a try!

Here is a solid, popular chicken recipe I’ve used before, and adapted here:

Here are a couple smoked chicken chili recipes I found while writing this up, that you might also like for inspiration:


Blackened Swordfish with Sweet Corn Salsa

20170909_194505

Blackened Swordfish with Sweet Corn Salsa

Well, I guess I’ve been away from this blog for a loooong time! Things are going well, I just haven’t been cooking too many new things.

However, making this swordfish dinner reminded me of my last post (last year), and reminded me to come back. :)

Swordfish a favorite and surprisingly easy, er, quick anyway. I made the salsa the other day with a couple lightly boiled cobs of fresh corn, a can of black beans, a touch of lemon juice, cider vinegar, red pepper, onion, apple cider vinegar and spices.

The thawed swordfish steaks cook in 5 minutes in a hot cast iron pan, 2-2.5 mins per side (from frozen at Trader Joe’s.)

I didn’t measure anything, but I’ve included a recipe below that’s a good basis for the blackening spices.

Enjoy!

20170909_194540

Blackened Swordfish with Sweet Corn Salsa

Turkey Chipotle Chili

Turkey Chipotle Chili with a dollop sour cream

Turkey Chipotle Chili

It’s a few days past Thanksgiving Day and, as usual, I’m already pretty sick of turkey.

Because I’m an idiot, I made a 14lb. bird for just two. Last year I did an even larger one for, essentially, just one. I’m sure I’ll do it again; I just like making the whole turkey including the neck (my personal favorite, when it’s cooked tender) and the giblets for the stuffing.  Still, for Thanksgiving dinner, we ate only the drumsticks, so there are a lot of leftovers, including nearly the whole turkey breast.

The goal with this chili was to have it taste as little like turkey as possible; it’s a twist on chicken chilis that I’ve had, significantly spiced with chipotle peppers and cumin. Ingredients include:

  • diced turkey breast
  • one medium yellow onion (small dice)
  • one green pepper (similarly diced)
  • olive oil, (generously, for sautéing)
  • soup stock (turkey)
  • crushed tomato (1 20 oz. can for two breasts)
  • black beans (I used rehydrated dried beans that had been frozen)
  • Mexican oregano (dried, crushed)
  • cumin (powdered, used generously)
  • chili en adobo (~1/2 can, minced; use sparingly to taste as these can be quite spicy)
  • chili powder
  • salt (to taste)

I found the tomato paste and fresh serrano pepper, shown in the photo below, to be unnecessary so didn’t use it this time.

Turkey Chipotle Chili ingregients

Turkey Chipotle Chili ingredients

Chili is an easy flexible recipe so I won’t bother with all the details, except a couple tips that I find useful. First, I like to sautée the fresh vegetables until tender and then stir them with the dry spices before adding liquid. Second, it’s best not to simmer pre-cooked meat (leftover, here) or beans too long as it can cause them to disintegrate due to overcooking and/or stirring.

Whole turkey breast

Whole turkey breast

I cut turkey breast into approximately 1/2 inch cubes.

Preparing Turkey Chipotle Chili

Preparing Turkey Chipotle Chili

Add the beans toward the end of the simmer and stir carefully thereafter to avoid mashing them.

Turkey chipotle chili

Turkey chipotle chili

That’s it: in about an hour, a simple delicious chili to dispatch with the leftover turkey white meat.

Turkey Chipotle Chili

Turkey Chipotle Chili served with a dollop of sour cream

I’m interested to know your Thanksgiving turkey leftover suggestions; I did the typical pot pie last year. one friend made enchiladas; I may try that with the dark meat.

Another friend posted this recipe for fritters made with stuffing: Latke-Crusted Turkey Stuffing Fritters With Liquid Cranberry Fritters with Liquid Cranberry Core and Schmaltz Gravy.

Happy belated Thanksgiving and peace to you and yours!

Chipotle Pork with Peach Habanero Salsa

Chipotle Pork Tenderloin with Peach Salsa and Sautéed Kale.

Chipotle Pork Tenderloin with Peach Salsa and sautéed kale greens.

While planning dinner for two, my partner and I realized we had a few too many ripe fresh peaches, so decided to make a spicy fruit salsa for meat, resulting in this nice summertime meal: chipotle pork tenderloin with peach salsa.

Preparing the salsa: fresh habanero, red onion, and cilantro.

Preparing the salsa: fresh habanero, red onion, and cilantro.

She prepared the salsa to generously serve two; the salsa consisted of three ripe peaches, pitted, and diced (medium, with skin intact), diced red onion, and finely chopped fresh cilantro, about 1/2 finely chopped fresh habanero pepper (seeds and veins removed), a touch of sugar and apple cider vinegar, and finally salt and a touch of powdered cumin and chipotle pepper, to taste.

Fresh Peach Salsa with Habanero.

Fresh Peach Salsa with Habanero.

I slathered a fairly small pork tenderloin with olive oil and finely chopped chipotle chile en adobo (from a can), browned it in a hot skillet, seasoned it with salt pepper and a bit of adobo seasoning, then placed the loin (whole) in a lightly-oiled glass baking dish and cooked in a 350° F oven for 30 minutes.  This typically yields a spectrum of doneness: from medium on the narrow end to medium rare on the thicker end, so plan accordingly with a few more minutes baking time, if you prefer it more well done.  We let the pork rest for about five minutes, then sliced it into medallions.

Our kale greens were simply sautéed in olive oil in a skillet (first covered, stirring occasionally, then uncovered for the final minutes to desired doneness) over medium low heat, and seasoned with salt and pepper.

We plated each serving with five or six pork medallions, a generous amount of the salsa, and garnished with a cilantro sprig.

Chipotle Pork Tenderloin with Fresh Peach Salsa and sautéed kale greens.

Chipotle Pork Tenderloin with Fresh Peach Salsa and sautéed kale greens.

There are a lot of variations on this pork tenderloin dinner for two that you might like to experiment with as well, such this nice Mustard and Black Pepper Pork Tenderloin.

Blog Anniversary Excess: the Quesarito!

A homemade quesarito

A homemade quesarito

WordPress just wished me happy anniversary… I’ve been blogging here for about a year. For no particular reason, I’m celebrating with this possible abomination: the quesarito – a humongous burrito made with a quesadilla.

Apparently, this was invented, or likely reinvented, by a Chipotle Mexican Grill customer; I wouldn’t be surprised if it was conceived drunkenly. It has achieved an underground following with accompanying rumors of its legitimacy, as was pointed out last week by a friend who posted this article: “The Mystery Behind Chipotle’s Secret 1,500-calorie Super Burrito“. Anyway, I’m not a regular customer, so I thought, “Why not just make this at home?” I’m pretty sure that my vegetarian version is trimmed down from their 1,500 calories, but perhaps not by much. The two 10-inch tortillas, alone, contribute 180 calories each, yet these are smaller than what Chipotle uses.

To start, I sautéed green pepper, red pepper, and red onion pieces in a bit of oil. Then I added a can of rinsed black beans, and stirred in a couple teaspoons of adobo seasoning and a touch of salt. The amount shown here is plenty for two burritos.

Sautéing vegetable filling and warming tortillas

Sautéing vegetable filling and warming tortillas

Meanwhile, I made a simple “double” quesadilla from two large flour tortillas, shredded sharp cheddar cheese, and dried cilantro leaf. I say “double,” because I typically make a quesadilla with just one tortilla, folded in half over the fillings.

Be sure not to make it too crispy, so that it won’t crack when wrapping the burrito.

Making the cheese quesadilla

Making the cheese quesadilla

Additional ingredients included: finely sliced romaine lettuce, ripe avocado, sour cream, Penzey’s Adobo seasoning, and Trader Joe’s awesome Jalapeno Pepper Hot Sauce.

Ingredients

Ingredients

Once the quesadilla was ready, the filling ingredients are piled on.

Quesarito in progress

Quesarito in progress

Because this wrapping tests the structural limits of the tortillas, I also wrapped it in foil, just like, umm, the finest restaurants do.

That's a wrap

That’s a wrap

That’s it: if you followed along, you’ve probably just made something you should be ashamed of, unless it’s your meal for the whole day.

Quesarito

Que sera sera: Quesarito

So, now the next time you need to add 400+ calories to your burrito, you know exactly what to do. :)

Here is the article that inspired this concoction:

P.S. If you’re a fan of stuffing things inside other things, you might like my “walking enchilada” as well: an enchilada stuffed in a breakfast burrito.

The Walking Enchilada

The Walking Enchilada

Perhaps next year, I’ll do a Tex-Mex turducken: an enchilada inside a burrito, inside a quesadilla… because that just totally makes sense.

Chipotle Carnitas

Chipotle carnitas and avocado taco

Chipotle carnitas and avocado taco

First off, if you landed here expecting an approximation of the carnitas from Chipotle Mexican Grill restaurant, you’re in the wrong place. Instead, it’s my slight twist on traditonal carnitas, the mexican pulled-pork staple.

Carnitas is one of my favorite taco and burrito fillings, but I’d not made this delicious meat at home.
I decided to start with Rick Bayless’ recipe that employs a two-phase cooking method: first moist, then dry[ing]. My variant uses chipotle peppers for flavor, rather than other spices or smoke flavoring.

Truth be told, my newfound inspiration to  actually make carnitas was that I found a lean 2 pound pork rib end roast in my freezer; I’d bought it some time ago on sale for less than $3 per pound. Also, I happened to have a broiler pan with rendered bacon fat from yesterday’s breakfast. Bacon fat is typically quite salty (compared to lard), but I had accidentally purchased low-sodium bacon, so I decided to experiment with using the bacon fat in place of salt and lard, or oil, that you typically find in carnitas recipes.

Soaking dried chipotle peppers

Soaking dried chipotle peppers

First, I soaked two large dried chipotle peppers, rinsed them, removed the veins, seeds, and stems, and then liquified them with some of the soaking water (~1 cup) in a blender.

Blended chipotles and soaking water

Blended chipotles and soaking water

Next, I cut the pork into approximately 2″ cubes and placed them in a baking dish. Because the rib end roast was quite lean, I added the warm rendered pork fat (~1/3 cup) from cooking 1 pound of low-sodium bacon (left from yesterday’s breakfast).

Boneless pork end rib roast, cubed and topped with rendered pork fat.

Boneless pork end rib roast, cubed and topped with rendered pork fat.

I poured the chipotle and water mixture over the pork, covered the dish, and put in a preheated 375° F oven for 1 hour.

Cover the pork with fat, and water mixture, in a covered dish in preparation for moist cooking phase.

Cover the pork with fat, and water mixture, in a covered dish in preparation for moist cooking phase.

After this, I uncovered the pork, placed the baking dish on a foil-covered pan (in case of spatter), and “dry cooked” until the water mostly evaporated, leaving just the rendered fat. During this phase, be sure to turn the pieces regularly, e.g., progressively more frequently to every 7-15 minutes, both to keep the pieces moist and to prevent burning on top.

Beginning dry cooking phase, uncovered.

Beginning dry cooking phase (uncovered)

Total cooking times was 2 hours 15 minutes: 1 hour moist cooking (covered) at 375° F and 1 hour 15 minutes dry cooking (uncovered, turning occassionally) at 450° F. Afterwards, I used two forks to pull the pork into small pieces.

Finished carnitas, pulled into small pieces with two forks.

Finished carnitas, pulled into small pieces with two forks.

I served the carnitas in tacos, on warmed tortillas, topped with a homemade chipotle garlic salsa and slices of fresh, ripe avocado.

Chipotle carnitas and avocado taco

Chipotle carnitas and avocado taco

This was a satisfying first effort at carnitas, having mild smokiness both from the bacon and from the chipotles. I’ll definitely make it again. I’ll caution you about using bacon fat here, though… it definitely had a generous amount of salt, so don’t add any more. A less-lean cut of pork would be a better option, obviating the need for added fat to get the moist consistency that one expects from carnitas.

Here are the recipes I consulted for preparation ideas:

UPDATE (March, 2013):

I made this again, this time with pork shoulder roast ($1.99/lb.), just its natural fat and a bit of salt, but with many more rehydrated chipotles and an ancho chile.  This was great too, and less salty than the prior experiment with rendered bacon fat.

Carnitas taco with white onion, cilantro, and hot sauce.

Carnitas taco with white onion, cilantro, and hot sauce.

UPDATE (March, 2014):

I tried this same preparation with beef shoulder roast. Unfortunately, this isn’t a great technique for beef; it just wasn’t tender. Once cooked, I had to chop the meat into tiny pieces. It tasted good, and is not unlike the texture of the finely chopped steak some mexican kitchens serve, but isn’t tender the way pot roast or barbacoa would be. For that, you’ll have to slow cook for longer time.

Beef shoulder roast prepared by this wet, then dry method; it's not the same.

Beef shoulder roast prepared by this wet, then dry method; it’s not the same.

Black Bean Chimichangas

Black Bean Chimichanga

Black Bean Chimichanga

Tonight I tackled that decadent Tex-Mex favorite: chimichangas!

I don’t eat chimichangas often; they’re delicious but don’t seem a particularly healthy choice. In fact, I can only remember ordering them once in recent years. One of my favorite local mexican restaurants makes them small, and fries them in some sort of basket/rack that pinches them to hold them closed, and serves them up 3 at a time. Here, I decided to make large (single-serving), vegetarian chimichanagas instead.

Ingredients (for 3 servings):

  • flour tortillas, e.g., 3 large, 10-inch
  • black beans, 1 can
  • sharp cheddar cheese, shredded, ~1 cup
  • bell pepper, 1 large, seeded, deveined, and finely diced
  • jalapeno pepper, 2, finely diced
  • garlic, 3 cloves, minced
  • cumin powder, ~1 t. or to taste
  • mexican oregano, ~1 t. or to taste
  • epazote, ~1 t. or to taste
  • canola oil (for frying)
  • all-purpose flour, ~1 T., to mix into a paste with water

Variation, add the following to the filling (to approximately double it):

  • whole kernel sweet corn, e.g., ~2/3 cup, from frozen
  • 8-10 oz. chopped fresh white button mushroom
Chimichanga filling ingredients

Chimichanga filling ingredients

To prepare, first sauté the peppers and garlic in canola oil in a small sauce pan.

Next, add the black beans, stir in the cumin and other spices, reduce heat and simmer. (I used the liquid from the can.)

Preparing the filling

Preparing the filling

When the liquid has reasonably reduced, stir in the shredded cheese and remove the filling from heat.

Adding cheese

Adding cheese

Prepare a couple tablespoons of paste  by combining flour and water; this will be used to “glue” the chimichangas closed while frying. (I recently learned this trick from the television program “America’s Test Kitchen.”)

Microwave the tortillas (perhaps 1.5 minutes on high) so that they are supple, and place some of the filling in the center, wrapping each one at a time.

Apply the flour-based glue to the edges of the tortilla when wrapping for deep-frying.

Wrapping and "glueing" the chimichangas

Wrapping and “glueing” the chimichangas

Heat canola oil in a pan (to ~300° F), perhaps 1/2 to 2/3″ deep, i.e., just enough so about 1/2 the thickness of the chimichanga is in the oil when they’re all placed in the pan simultaneously. You can test that the oil is at a frying temperature by seeing that it bubbles when a small piece of tortilla is inserted.

Place the chimichangas carefully into the oil, seam-side down first.

Deep-frying chimichangas, one side at a time

Deep-frying chimichangas, one side at a time

After 2-3 minutes, check to see if the undersides are browned. Turn the chimichangas over, when they’re nicely browned on the bottoms.

Flipping and frying the other side

Flipping and frying the other side

Carefully remove the chimichangas when the tops are attractively browned and place them on a rack with paper towels and allow them to cool slightly while excess oil drains from them.

I served my chimichanga with a simple salad of chopped lettuce, tomato, and a lime wedge, and accompanied it with sour cream.

Chimichanga filled with black beans, peppers, and cheese

Chimichanga filled with black beans, peppers, and cheese

All in all, these chimichangas were as tasty as those typically found in restaurants, and surprisingly easy to prepare; give them a try sometime when you’re in the mood to spoil yourself!

To serve leftover chimichangas (from the refrigerator): First, microwave each chimichanga on high, for perhaps 1 minute 30 seconds. Then bake the chimichanga, optionally covered with sauce and/or cheese, in a toaster oven or conventional oven at 350-400° F for a couple minutes; this will make them wonderfully crispy as when served fresh.

Here’s the Cook’s Country / America’s Test Kitchen TV video recipe that suggested using the flour/water paste to “glue” chimichangas for frying:

Chicken and Egg Breakfast Nachos

Chicken and Egg Breakfast Nachos with pasilla salsa and jalapenos.

Chicken and Egg Breakfast Nachos with pasilla salsa and jalapenos.

Which came first, the chicken or the egg?
It was the egg. (Dinosaurs, the ancestors of the chicken, and many other animals layed eggs.)

This morning, I got up late (as usual), saw this beautiful snowy scene outside, and perused two generous online invitations to brunch this morning.  Hmm, shower, dress, find the shovel, … drive the 4×4 to one of these restaurants or just sit my ass on the couch? Guess which one won.

DSC06857

My backyard with the first proper snowfall of the season

For this breakfast I boiled a couple fresh jalapenos, whipped up some scrambled eggs, stirred in some chipotle-seasoned pulled chicken; bell pepper and jalapeno strips (leftover from yesterday’s fajitas); and shredded cheddar.  Then I assembled the nachos on a plate with blue corn tortilla chips, topped with a pasilla salsa (the first I opened from the summertime canning) and a tender jalapeno.

Breakfast nachos on a wintery morning.

Breakfast nachos on a wintery morning.

A pleasant, if not lonely, breakfast on this beautiful wintery morning.
I even eased into the season with some holiday music.

I hope my friends fared as well with their brunches.

Tortas de Milanesa

Torta de Milanesa, shown open-faced

Tortas – Mexican sandwiches – are one of my favorite foods by which I commonly measure Mexican restaurants. The humble torta seems spretty simple, consisting of various taco and salad ingredients on a nice roll, but it’s definitely a skill to do it right.

I’m preparing for a “Last Meal“-themed party in a couple weeks, so I thought I’d try making tortas myself as a potential candidate for the party. The one I made here is the common “Torta de Milanesa,” basically a Mexican breaded steak sandwich.

Ingredients for Tortas de Milanesa

Ingredients:

  • thinly cut round or other steak, i.e., 1/4″-1/3″ thick
  • refriend beans (I used some made with chorizo)
  • flour
  • egg (beaten, as a wash to adhere the flour)
  • onion
  • tomato
  • lettuce
  • ripe avocado
  • rolls, e.g., club rolls or baguette
  • oil, e.g., canola
  • hot sauce, e.g., Valentina Salsa Picante

An unusual choice I made was to use masa flour, the sort used to make corn tortillas, rather than all-purpose flour and/or bread crumbs; this was so that the steak cutlets would be acceptable to my gluten-free friends. (Of course, the roll would be eliminated for them too.)

Flattened, tenderized round steak, ready for dipping in egg and dredging in spiced flour

Trim the steak and pound the steak pieces to tenderize and flatten to about 1/4″ thick. Dip them in egg wash, and then in flour that is spiced generously with salt and pepper.

Breaded steak frying in canola oil

Pan fry the breaded cutlets in oil, a couple minutes per side until cooked through.

Pan-fried, masa flour-breaded, round steak

To assemble the sandwich, slice the roll, e.g. a club roll, and consider removing some of the bready inside (to make room for ingredients, while making the sandwich still able to be easily managed in hand). Then smear the roll with refriend beans, add the breaded steak, sliced raw onion, sliced tomato, chopped lettuce, avocado slices, and hot sauce.

Torta de Milanesa

Here are some torta recipes that I consulted:

To be honest, this first attempt of mine was tasty, but no where near the best torta I’ve had. I have some adjustments to make to perfect it. The masa flour worked fine, but I would spice it even more generously. The meat really needs to be tenderized thoroughly, otherwise chopped for the sandwich so that it’s easy to bite through. The roll is a particularly difficult part… while it may be true that a crusty bread or roll is common, it makes it extremely messy to eat because the beans and avocado are squeezed out of the sandwich as you bite. The restaurant I most often visit uses a large, round soft roll, that doesn’t result in this problem.

There are a lot of common torta variations such as vegetarian (avocado), pulled chicken, and chopped steak.

Enjoy this favorite of mine sometime at a restaurant or at home!

My Favorite Salsa Recipe: Salsa Romesco

Four canned salsas based on Salsa Romesco with (left to right) pasilla, chipotle, habanero, and cayenne

Here’s a spectacular salsa that I’ve been making for 15 years – Salsa Romesco, with a surprising ingredient: almonds!

If you’re a friend to whom I’ve given salsa, it almost certainly was this one.
It’s a spanish recipe from chef Mark Miller’s excellent guide, “The Great Salsa Book.”

The particularly nice qualities of this salsa are its sweetness from red pepper, its relatively smooth, thick consistency (e.g., for dipping chips or as an enchilada sauce), and its easily adjustable heat simply based on the amount of powdered cayenne pepper. I’ve included the original recipe below.

In a moment of farmers’ market enthusiasm, I bought a 25 pound box of tomatoes for $10. It turns out that’s a lot of tomatoes! I oven-roasted about half of these large, wonderfully red tomatoes to make 4 slightly different salsas.

To oven-roast tomatoes, simply cut them and lay them out on a sheet in a 250° F oven for 2-3 hours.  I put a bit of salt on on them beforehand. Large tomatoes can be quartered and roma tomatoes, as the original recipe called for, halved.

Quartered, and salted, tomatoes ready for oven-roasting.

The roasting removes some of the moisture, setting up for a nice blended salsa of a thick consistency and water doesn’t separate so much as with raw tomato-based salsas. (Of course, those salsas have their place; who could live without pico de gallo?)

I’ve made this Salsa Romesco many, many times (recipe below), spiced just with cayenne. This time I also rehydrated some pasilla and chipotle (meco type) peppers while the tomatoes were roasting, and finely minced one seeded, deveined fresh habanero. This was to make salsa variations with differing hotness and flavors. My pasilla peppers happened to be considerably hotter than the chipotle… many pepper varieties’ hotness is somewhat unpredictable.

Soaking dried pasilla and chipotle peppers

Once the tomoatoes are roasted, you can simply blend them in a food processor or blender for sauces and salsas.

Oven-roasted tomatoes, after about 3 hours at 250° F

After the passive hours of roasting tomatoes and rehydrating peppers, you’re ready to make this salsa; everything is blended, so there’s not much chopping.

Ingredients, in addition to tomatoes, needed for Salsa Romesco.

There is a bit of work; you will need to remove the skins from red peppers. I suppose removing the skin is optional, but it does two things: (a) it makes the salsa sweeter since the skin imparts a little bitterness, and (b) it keeps the skins (mostly) out of the resulting salsa, so it doesn’t get stuck between your teeth.

Red bell peppers, roasted for peeling

For me, the easiest way to roast and peel bell peppers has been to place them on a foil-lined sheet very near the heat in the broiler, watching them carefully and rotating them until all sides are blackened as shown.  Place the roasted peppers in a plastic bag or covered bowl for a while to steam them (helping the skin to separate), and then peel them (as best you can), remove core and seeds, and rinse the pepper.

Here’s Mark Miller’s recipe (my comments in parentheses… I approximately tripled this in quantity):

  • 10 Roma tomatoes, oven-roasted
  • 2 red bell peppers, roasted, peeled, seeded, and roughly chopped
  • 3 cloves garlic
  • 1/2 cup toasted sliced almonds
  • 2 teaspoons cayenne powder (careful! … to taste, make separate salsas for different palates)
  • 1 teaspoon salt
  • 2 tablespoons sherry vinegar (or apple cider vinegar)
  • 1 tablespoon fresh lemon juice
  • 1 tablespoon virgin olive oil

Place all ingredients in a food processor or blender and purée.
Variation: Add 1 anchovy filet to the food processor.
Note: This is a classic Spanish salsa.
Serving suggestions: A versatile salsa, good with tortilla chips or as a dip for vegetables; with grilled meats fish or eggs; or as a soup garnish.
Yield: About 1 3/4 cups
Heat: 5-6 (of 10, it solely depends on how much cayenne powder you add, it’s even nice and sweet with almost no cayenne… but I usually make it spicy.)

I made 4 variations, canning some of each for wintertime and keeping some fresh in the refrigerator (for days, at least), shown left to right in the top photo:

  • Hot pasilla and red pepper
  • Medium chipotle and red pepper
  • Hot habanero-garlic and red pepper
  • Mild sweet red pepper

I shared them with friends and all were popular but my favorites were the hot pasilla and the hot (fresh) habanero and garlic.

Fresh prepared salsas based on Salsa Romesco recipe

As I said, this salsa is my favorite to make myself and is a great foundation for creativity.
It takes a few hours, but most of that is not active time; it’s just waiting.  Maybe make a nice meal in the mean time, while the kitchen has the pleasant smell of roasted tomato. :)